Peanut butter oat bars offer a satisfying snack that fits perfectly into a low FODMAP lifestyle. These homemade granola bars combine certified gluten-free oats with natural peanut butter to create an IBS-friendly treat that won’t trigger digestive symptoms. Making your own healthy oat bars recipe gives you complete control over ingredients, portion sizes, and flavour while avoiding high FODMAP additives found in shop-bought versions.
This recipe works for beginners with basic baking skills. You’ll need about 35 minutes total, including prep and baking time. The bars require simple mixing, no special techniques, and use ingredients you likely have in your pantry. You’ll end up with portable, nutritious snacks that keep well for days.
Why peanut butter oat bars work for low FODMAP diets
These peanut butter oatmeal bars rely on ingredients that sit comfortably within low FODMAP guidelines. Certified gluten-free oats contain no FODMAPs when kept to appropriate serving sizes. Natural peanut butter, made from just peanuts and salt, provides safe protein and healthy fats without triggering IBS symptoms. Maple syrup acts as a low FODMAP sweetener that binds ingredients together whilst adding natural sweetness.
The nutritional profile makes these FODMAP-friendly snacks ideal for managing digestive health. Each bar delivers sustained energy from complex carbohydrates, protein to keep you satisfied, and healthy fats that support nutrient absorption. Unlike commercial granola bars that often contain high FODMAP ingredients like honey, dates, or inulin, these homemade versions give you exactly what your gut can handle.
The bars satisfy sweet cravings without compromising your elimination phase progress. They provide a chewy, substantial texture that feels indulgent whilst remaining gentle on your digestive system. This makes them perfect for packed lunches, post-workout snacks, or those moments when you need something filling between meals.
Gather your low FODMAP ingredients and tools
You’ll need these FODMAP-safe ingredients for a batch of 12 bars:
- 200g certified gluten-free rolled oats
- 120g natural peanut butter (check labels for added ingredients)
- 80ml pure maple syrup
- 60g dairy-free butter or coconut oil
- 1 teaspoon vanilla extract
- 1/4 teaspoon salt
- 30g dark chocolate chips (optional, check FODMAP certification)
Essential kitchen tools include a 20cm square baking tin, parchment paper, two mixing bowls (one large, one medium), a wooden spoon or spatula, and measuring cups. A small saucepan helps melt wet ingredients together smoothly.
Substitution options keep these gluten-free peanut butter bars flexible. Replace peanut butter with almond butter if preferred, though check your personal tolerance during reintroduction. Swap maple syrup for rice malt syrup in equal amounts. Use regular butter if you tolerate lactose, or stick with plant-based alternatives for a fully dairy-free version.
Portion guidance matters for FODMAP compliance. Each bar should weigh roughly 50g, keeping oat content within safe limits. Larger portions might push you over recommended FODMAP thresholds, so resist the temptation to cut bigger squares.
Preparing your workspace
Preheat your oven to 175°C (160°C fan). Line your baking tin with parchment paper, leaving overhang on two sides for easy removal later. This prevents sticking and makes cleanup simple. Set out all ingredients before you start mixing so the process flows smoothly.
Mix and prepare your oat bar base
Pour the gluten-free oats into your large mixing bowl. Add the salt and stir them together with a wooden spoon. This distributes the salt evenly throughout the dry ingredients before wet ingredients are added.
Place the dairy-free butter (or coconut oil), peanut butter, and maple syrup in your small saucepan. Warm over low heat, stirring constantly until everything melts together into a smooth mixture. This takes about 3 minutes. Remove from heat and stir in the vanilla extract.
Pour the warm peanut butter mixture over your dry oats. Stir thoroughly until every oat is coated and no dry patches remain. The mixture should look glossy and stick together when pressed. If you’re adding dark chocolate chips, fold them in now whilst the mixture is still warm but not hot enough to melt them completely.
The consistency should feel sticky but not wet. If your mixture seems too dry and won’t hold together when squeezed, add a tablespoon of melted coconut oil. If it’s too wet and runny, add 20g more oats. Getting this balance right ensures your easy oat bar recipe holds together after baking without becoming crumbly.
Checking your mixture
Press a small amount between your fingers. It should compact into a solid clump that holds its shape. This test confirms you’ve achieved the right texture for bars that slice cleanly later.
Bake and set your peanut butter oat bars
Transfer the oat mixture to your prepared baking tin. Use the back of a spoon or your hands (slightly dampened to prevent sticking) to press the mixture firmly and evenly into the tin. Push down hard, compacting everything into a solid, level layer. The firmer you press, the better your bars will hold together.
Pay special attention to corners and edges where mixture tends to be thinner. An even layer ensures uniform baking and prevents some sections from becoming too hard whilst others stay underdone.
Bake for 20 minutes for chewy bars or 25 minutes for crunchier texture. The edges should turn golden brown, and the centre should look set rather than wet. The bars will firm up considerably as they cool, so don’t overbake trying to achieve final texture whilst still hot.
Remove from the oven and let cool completely in the tin. This takes at least 90 minutes at room temperature. Trying to cut warm bars results in crumbling and messy edges. Patience during this cooling phase makes the difference between neat squares and broken pieces.
Testing for doneness
The surface should feel dry to touch, not sticky. Edges will pull slightly away from the tin sides. A light press on the centre should feel firm, with minimal give. These indicators confirm your no bake peanut butter bars (technically baked, but requiring minimal oven time) are ready for cooling.
Store and customize your oat bars
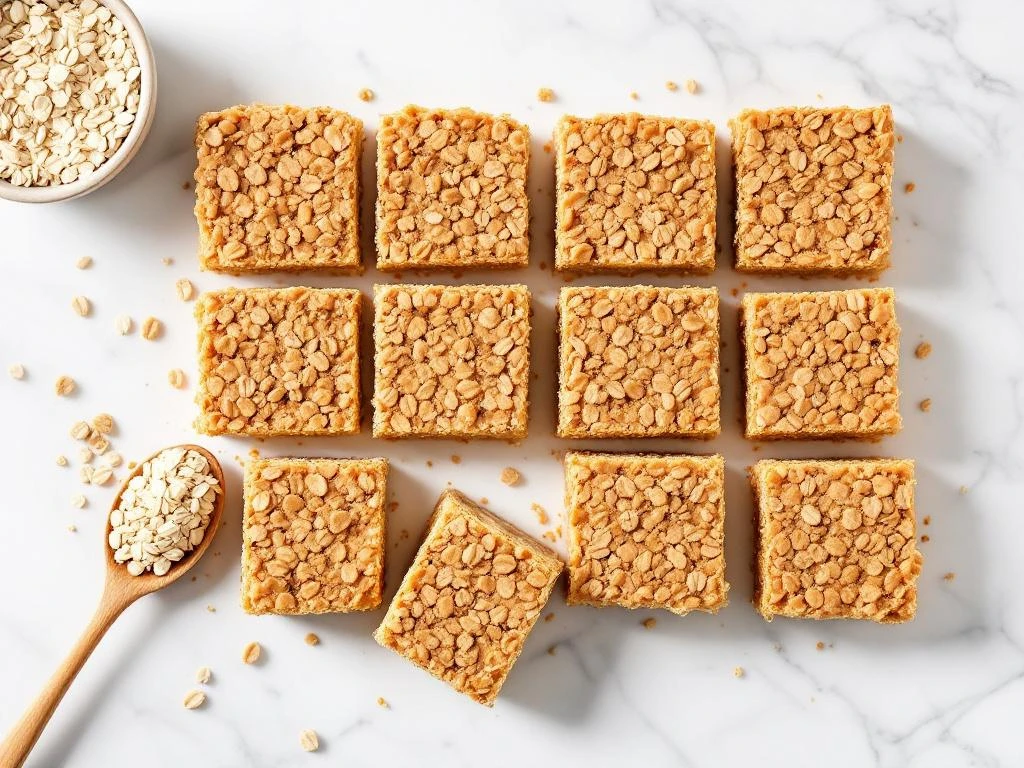
Once completely cool, lift the entire slab out using the parchment paper overhang. Place on a cutting board and use a sharp knife to cut into 12 equal bars. Wipe your knife between cuts for clean edges.
Store these IBS-friendly snacks in an airtight container at room temperature for up to 5 days. Layer parchment paper between bars to prevent sticking. Refrigeration extends shelf life to 10 days and creates a firmer, chewier texture that some prefer.
For longer storage, wrap individual bars in cling film and freeze for up to 3 months. Thaw overnight in the fridge or at room temperature for 30 minutes before eating. Frozen bars work brilliantly for grab-and-go convenience.
Creative low FODMAP variations
Add 30g of low FODMAP seeds like pumpkin or sunflower for extra crunch and nutrition. Stir in 1/4 teaspoon of cinnamon or ginger for warmth. Drizzle melted dark chocolate over cooled bars for a decorative finish. Press a few extra peanuts on top before baking for visual appeal and added protein.
Replace half the peanut butter with tahini for a different flavour profile. Add 20g of shredded coconut (check your tolerance) for tropical notes. Experiment with different extracts like almond or coconut instead of vanilla.
Keep portion sizes consistent when adding extras. Additional ingredients shouldn’t push FODMAP content beyond safe levels. Track your personal reactions during reintroduction phases to understand which variations work best for your digestive system.
Peanut butter oat bars
Cooking Time: 35 minutes (10 minutes prep, 25 minutes baking and cooling) | Portions: 12 bars
Ingredients
- 200g certified gluten-free rolled oats
- 120g natural peanut butter
- 80ml pure maple syrup
- 60g dairy-free butter or coconut oil
- 1 teaspoon vanilla extract
- 1/4 teaspoon salt
- 30g dark chocolate chips (optional)
Method
- Preheat oven to 175°C and line a 20cm square tin with parchment paper
- Combine oats and salt in a large bowl
- Melt butter, peanut butter, and maple syrup in a saucepan over low heat
- Remove from heat and stir in vanilla extract
- Pour wet mixture over oats and stir until completely coated
- Add chocolate chips if using
- Press mixture firmly into prepared tin
- Bake for 20-25 minutes until edges are golden
- Cool completely in tin (90 minutes minimum)
- Cut into 12 equal bars and store in an airtight container
This recipe is for informational purposes only and is not medical or dietary advice. Please consult a healthcare professional before making any changes to your diet.
Related Articles
- Gluten-Free Carrot Pineapple Muffins
- Rice Cakes with Almond Butter
- Quinoa Breakfast Bowl with Kiwi
- Which fruit is highest in FODMAPs?
- Scrambled Eggs with Roasted Peppers