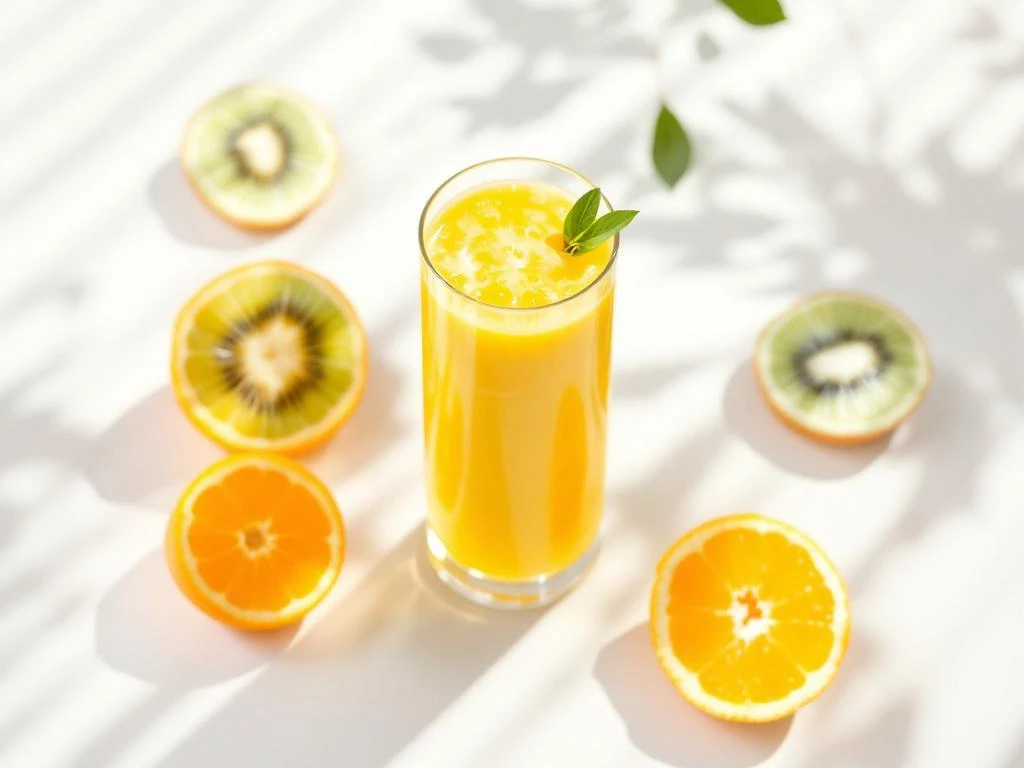
When you’re managing IBS symptoms, finding safe and delicious drinks can feel like a challenge. This orange kiwi smoothie gives you a refreshing, nutrient-packed option that fits perfectly into a low FODMAP diet. The bright citrus flavour combined with the tropical sweetness of kiwi creates a satisfying breakfast or snack that won’t trigger digestive discomfort.
This guide is perfect for beginners. You’ll need about 10 minutes to prepare and blend this FODMAP friendly smoothie. All you need is a blender, fresh fruit, and a few simple ingredients you likely already have at home. By the end, you’ll have a creamy, restaurant-quality smoothie that’s safe for your sensitive stomach.
Why this orange kiwi smoothie works for IBS
Oranges and kiwis both fit into a low FODMAP diet when you stick to the right portions. One medium orange is considered low FODMAP, and kiwi fruit is low FODMAP at two small kiwis per serving. These fruits provide natural sweetness without the high fructose levels that trigger IBS symptoms in many people.
Kiwis offer particular digestive benefits. They contain an enzyme called actinidin that helps break down protein and supports healthy digestion. The soluble fibre in both fruits promotes regular bowel movements without causing the bloating or gas associated with high FODMAP foods.
The key to keeping this orange smoothie recipe IBS-friendly is portion control. Using one orange and one to two kiwis per serving keeps FODMAP levels safe whilst providing vitamin C, fibre, and natural energy. This combination is gentle on sensitive stomachs whilst delivering the nutrients your body needs.
Gather your ingredients and tools
For this low FODMAP smoothie, you’ll need the following ingredients:
- 1 medium orange (about 130g), peeled and segmented
- 1 to 2 small kiwis (about 70g each), peeled
- 125ml lactose-free milk or almond milk (small serving to stay low FODMAP)
- 60ml water or additional lactose-free milk
- 3 to 4 ice cubes
- Optional: 1 teaspoon maple syrup (if you prefer extra sweetness)
Your essential kitchen equipment includes a blender (any standard blender works well), a sharp knife, a cutting board, measuring cups and spoons, and a tall glass for serving. If you’re using a high-speed blender, you’ll get an even smoother texture, but a regular blender produces excellent results too.
Before you start, make sure your fruit is ripe but firm. Overripe kiwis can make your smoothie too tart, whilst underripe ones won’t blend as smoothly. The orange should give slightly when you press it, indicating it’s juicy and ready to use.
Prepare your fruit for blending
Start by washing your orange and kiwis under cool running water. Pat them dry with a clean kitchen towel. For the orange, use a sharp knife to slice off both ends. Stand the orange upright and carefully cut away the peel and white pith in downward strokes, following the curve of the fruit.
Once peeled, hold the orange over a bowl to catch any juice. Use your knife to cut along each membrane and release the segments. Remove any visible seeds as you go. This method gives you clean fruit pieces without the bitter pith that can make your digestive friendly smoothie taste unpleasant.
For the kiwis, slice off both ends with your knife. Insert a spoon between the flesh and the skin, then rotate the kiwi to separate them cleanly. Alternatively, you can peel them with a vegetable peeler. Cut each kiwi into quarters to help your blender process them more easily. Removing any hard white core from the centre prevents chunks in your final smoothie.
Blend your orange kiwi smoothie perfectly
Add your ingredients to the blender in this specific order for the best results. Pour in the lactose-free milk and water first. This liquid base prevents the blender blades from getting stuck. Next, add the orange segments, followed by the kiwi pieces. Place the ice cubes on top last.
Start blending on low speed for about 10 seconds to break down the larger fruit pieces. Increase to medium speed for another 15 seconds, then finish on high speed for 20 to 30 seconds. The total blending time should be around 45 seconds to one minute. You’ll know it’s ready when the mixture looks completely smooth with no visible fruit chunks or ice pieces.
Check the texture by stopping the blender and looking at the colour and consistency. Your kiwi smoothie should be a vibrant orange-green colour with a creamy, pourable texture. If you see any fruit pieces floating, blend for another 10 to 15 seconds. Avoid over-blending, which can make the smoothie foamy and warm rather than cold and refreshing.
Customise your smoothie with FODMAP-safe additions
You can personalise this easy fruit smoothie whilst keeping it IBS-friendly. For added protein, include one tablespoon of smooth peanut butter (low FODMAP in this amount) or a serving of low FODMAP protein powder. These additions make the smoothie more filling without triggering symptoms.
To adjust sweetness, try a small amount of maple syrup (one teaspoon is safe) or a pinch of stevia. Some people enjoy adding a quarter teaspoon of vanilla extract for extra flavour depth. Fresh mint leaves (two to three leaves) provide a refreshing twist that complements both the orange and kiwi.
For texture variations, add half a small frozen banana (low FODMAP at this portion) to create a thicker, creamier consistency. You can also include one tablespoon of chia seeds for extra fibre and omega-3 fatty acids. Just remember that chia seeds thicken the smoothie as they sit, so drink it promptly or add a bit more liquid if needed.
Fix common smoothie texture problems
If your IBS smoothie recipe turns out too thick, add liquid gradually. Pour in 30ml of lactose-free milk or water at a time, blending briefly after each addition. This prevents you from making it too thin. A smoothie that’s too thick won’t pour easily and can be difficult to drink through a straw.
A watery texture usually means too much liquid or not enough ice. Add two to three more ice cubes and blend again. You can also add an extra quarter of a kiwi or a few orange segments to thicken it naturally. Frozen fruit works particularly well for creating body without diluting the flavour.
If your orange kiwi smoothie tastes too bitter, the white pith from the orange is likely the culprit. Next time, remove more of the pith during peeling. To fix the current batch, add half a teaspoon of maple syrup or a splash more kiwi for natural sweetness. Bitterness can also come from over-blending, which breaks down the fruit too much and releases bitter compounds.
Separation happens when smoothies sit for too long. The heavier particles sink whilst liquid rises to the top. Simply give it a quick stir or a few seconds in the blender before drinking. To prevent separation, add a small amount of chia seeds or a tablespoon of lactose-free yoghurt, which act as natural stabilisers.
Orange kiwi smoothie
Preparation time: 10 minutes | Servings: 1
- Wash and peel 1 medium orange, removing all white pith and seeds
- Peel 1 to 2 small kiwis and quarter them
- Add 125ml lactose-free milk and 60ml water to your blender
- Place orange segments and kiwi pieces into the blender
- Add 3 to 4 ice cubes on top
- Blend on low for 10 seconds, then medium for 15 seconds
- Finish on high speed for 20 to 30 seconds until completely smooth
- Check texture and blend another 10 seconds if needed
- Pour into a glass and enjoy immediately
- Optional: customise with low FODMAP additions like peanut butter or maple syrup
This recipe is for informational purposes only and is not medical or dietary advice. Please consult a healthcare professional before making any changes to your diet.
Related Articles
- What pasta is best for IBS?
- Do bananas make IBS worse?
- What to eat to harden stool in IBS?
- What is the most common FODMAP trigger?
- Scrambled Eggs with Lactose-Free Feta