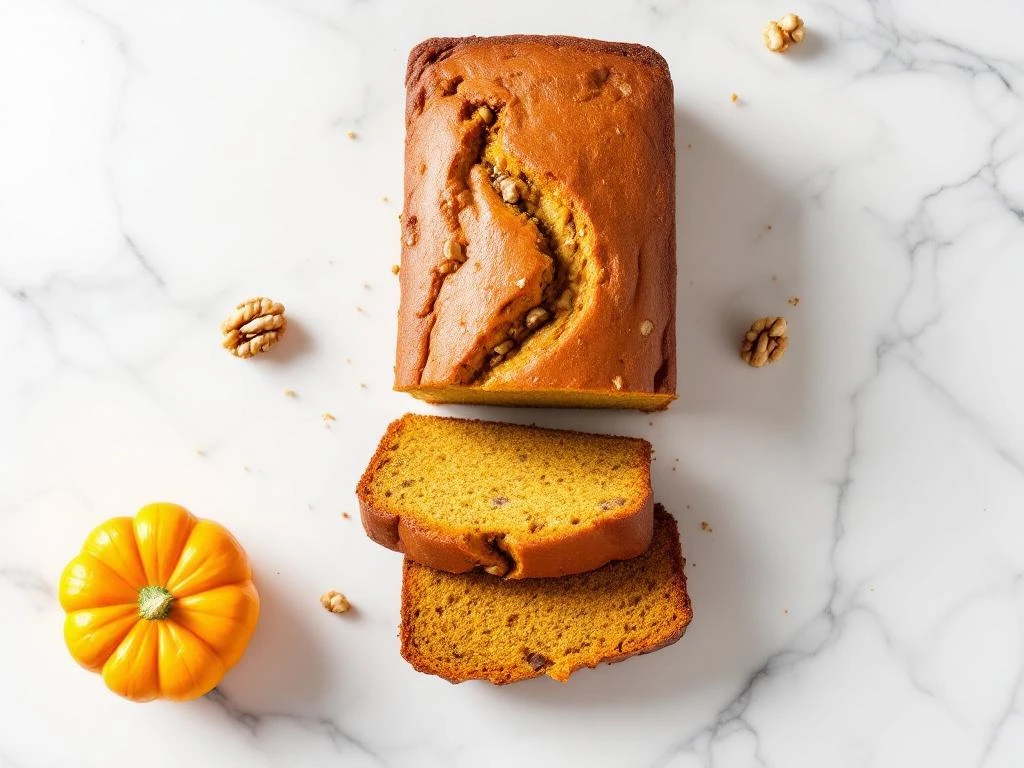
Baking gluten-free pumpkin bread at home gives you control over ingredients while creating a delicious treat that’s gentle on sensitive digestion. This IBS-friendly pumpkin walnut bread recipe uses low FODMAP ingredients and gluten-free flour to deliver flavour without triggering symptoms. The process takes about 75 minutes from start to finish, including baking time. You’ll need basic baking equipment and readily available ingredients. Whether you’re new to gluten-free baking or experienced with low FODMAP cooking, this straightforward recipe produces a moist, flavourful loaf every time.
Why gluten-free pumpkin walnut bread works for IBS
This recipe addresses digestive sensitivities through careful ingredient selection. Pumpkin puree provides natural moisture and subtle sweetness without high FODMAP sugars that trigger IBS symptoms. The vegetable is gentle on your gut whilst delivering vitamins A and C plus beneficial fibre that supports digestive health without causing discomfort.
Gluten-free flour blends replace wheat flour to eliminate gluten, a common IBS trigger. Using a combination of rice flour and tapioca starch creates the right texture without the digestive challenges wheat presents. These alternative flours work together to form structure in your bread whilst remaining easy to digest.
Walnuts add healthy fats and protein to this gluten-free pumpkin bread recipe. They’re naturally low FODMAP in appropriate portions and provide omega-3 fatty acids that support overall wellness. The nuts create pleasant texture contrast without overwhelming your digestive system. This IBS-friendly pumpkin bread balances nutrition with symptom management, making it practical for daily enjoyment.
Gather ingredients and tools for pumpkin bread
You’ll need specific ingredients to create this low FODMAP pumpkin bread. Start with 200g gluten-free flour blend (rice flour and tapioca starch work well together). Get 200g pure pumpkin puree, not pumpkin pie filling which contains added sugars and spices. Use 100g granulated sugar, 2 large eggs, 80ml vegetable oil, and 60g chopped walnuts.
Additional ingredients include 1 teaspoon baking powder, 1/2 teaspoon bicarbonate of soda, 1/2 teaspoon ground cinnamon, 1/4 teaspoon ground ginger, and 1/4 teaspoon salt. Make sure your pumpkin puree is plain and unsweetened. Check that your gluten-free flour blend doesn’t contain high FODMAP ingredients like chickpea flour or soy flour.
Essential equipment includes:
- 23cm loaf tin
- Two mixing bowls (one large, one medium)
- Whisk and spatula
- Measuring cups and spoons
- Baking parchment or cooking spray
Prepare your workspace before you begin mixing. Line your loaf tin with baking parchment or grease it thoroughly. This prevents sticking, which is especially important with gluten-free batters that can be more delicate than wheat-based ones.
Mix and prepare the pumpkin walnut batter
Preheat your oven to 180°C (160°C fan). Combine the pumpkin puree, eggs, vegetable oil, and sugar in your large bowl. Whisk these wet ingredients until smooth and well blended. The mixture should look uniform with no streaks of egg visible.
Mix your dry ingredients in the medium bowl. Combine the gluten-free flour, baking powder, bicarbonate of soda, cinnamon, ginger, and salt. Whisk them together to distribute the leavening agents and spices evenly throughout the flour. This step prevents clumps of baking powder in your finished bread.
Add the dry mixture to the wet ingredients gradually. Fold them together with your spatula using gentle motions. Gluten-free baking requires a lighter touch than traditional baking. Stop mixing as soon as you no longer see dry flour. Overworking gluten-free batter can make your bread dense and gummy.
Fold in the chopped walnuts last. Distribute them throughout the batter with a few gentle stirs. The batter will be thicker than traditional cake batter but should still pour slowly. If it seems too thick, add a tablespoon of water. Pour the mixture into your prepared loaf tin and smooth the top with your spatula.
Check your batter consistency
Your pumpkin walnut bread recipe batter should fall slowly from your spatula rather than running off quickly. It needs to be thick enough to support the walnuts without them sinking to the bottom. If your batter seems too runny, it might indicate measurement errors. Too thick, and your bread will be dense. The right consistency resembles thick porridge.
Bake and test for perfect doneness
Place your loaf tin in the centre of the preheated oven. Bake for 50 to 60 minutes without opening the oven door for the first 45 minutes. Opening the door early can cause the bread to sink in the middle, particularly problematic with gluten-free batters that lack the structural support gluten provides.
Visual cues help you judge doneness. The top should turn golden brown and feel firm when lightly touched. The edges will pull away slightly from the sides of the tin. Small cracks on the surface are normal and actually indicate proper baking.
Test for doneness at the 50-minute mark. Insert a wooden skewer or toothpick into the centre of the loaf. It should come out clean or with just a few moist crumbs attached. Wet batter on the skewer means the bread needs more time. Check again every 5 minutes until the test shows it’s done.
The internal temperature should reach 95°C if you’re using a cooking thermometer. This ensures the centre is fully baked. Gluten-free walnut bread can look done on the outside whilst remaining underbaked in the middle, so the skewer test is essential.
Avoid common baking mistakes
Don’t reduce the baking time even if the top browns quickly. Cover the loaf loosely with foil if the surface is darkening too fast but the centre isn’t done. Gluten-free bread often takes longer to bake through than wheat-based versions. Trust the skewer test over timing alone.
Store and serve your gluten-free pumpkin bread
Leave the bread in the tin for 10 minutes after removing it from the oven. This brief rest helps it set and makes removal easier. Run a knife around the edges if needed, then turn the loaf onto a cooling rack. Let it cool completely before slicing, at least one hour.
Slice your easy pumpkin bread with a serrated knife using a gentle sawing motion. Gluten-free bread can crumble if you press down too hard. Cutting when fully cool gives you neater slices. The bread tastes best at room temperature or slightly warmed.
Store the cooled loaf wrapped in cling film or in an airtight container at room temperature for up to 3 days. Refrigeration extends freshness to 5 days but can make the texture slightly denser. Bring refrigerated slices to room temperature or warm them briefly before eating for better texture.
Freeze individual slices for longer storage. Wrap each slice in cling film, then place them in a freezer bag. They’ll keep for up to 3 months. Thaw slices at room temperature for about 30 minutes or toast them directly from frozen.
Serving suggestions for low FODMAP enjoyment
Enjoy your homemade pumpkin bread plain or with low FODMAP spreads. Lactose-free butter works well, as does a thin layer of peanut butter if you tolerate it. Pair a slice with a cup of peppermint tea for a soothing snack that’s gentle on your digestive system. This FODMAP-friendly dessert also makes an excellent breakfast option alongside scrambled eggs.
You’ve created a nutritious, flavourful bread that supports your dietary needs without sacrificing taste. This recipe proves that managing IBS doesn’t mean giving up baked goods you love. The techniques you’ve learned apply to other gluten-free baking projects, giving you confidence to explore more recipes. Keep this pumpkin bread with walnuts in your regular rotation for a reliable treat that works with your digestion.
Gluten-free pumpkin walnut bread
Cooking Time: 75 minutes | Portions: 10 slices
- 200g gluten-free flour blend (rice flour and tapioca starch)
- 200g pure pumpkin puree
- 100g granulated sugar
- 2 large eggs
- 80ml vegetable oil
- 60g chopped walnuts
- 1 teaspoon baking powder
- 1/2 teaspoon bicarbonate of soda
- 1/2 teaspoon ground cinnamon
- 1/4 teaspoon ground ginger
- 1/4 teaspoon salt
Steps:
- Preheat oven to 180°C (160°C fan) and prepare 23cm loaf tin
- Whisk together pumpkin puree, eggs, oil, and sugar until smooth
- Mix flour, baking powder, bicarbonate of soda, spices, and salt separately
- Fold dry ingredients into wet mixture gently until just combined
- Stir in chopped walnuts
- Pour batter into prepared tin
- Bake 50 to 60 minutes until skewer comes out clean
- Cool in tin 10 minutes, then transfer to rack
- Cool completely before slicing
- Store wrapped at room temperature up to 3 days or freeze up to 3 months
This recipe is for informational purposes only and is not medical or dietary advice. Please consult a healthcare professional before making any changes to your diet.
Related Articles
- Can I eat pasta with IBS?
- What are 5 signs your body has inflammation?
- What foods heal the colon?
- Gluten-Free English Muffin with Jam
- What is the gentlest food on the stomach?