Making your own gluten-free granola with almond milk gives you complete control over ingredients, which matters when you’re managing IBS or following a low FODMAP diet. This beginner-friendly recipe takes about 40 minutes of active time, with most of that being simple mixing and occasional stirring. You’ll need basic kitchen equipment like a baking sheet, mixing bowls, and an oven. The result is a crunchy, customisable breakfast that’s gentle on your digestive system and costs much less than shop-bought alternatives. This guide walks you through each step, from selecting the right ingredients to storing your finished granola properly.
Why make gluten-free granola with almond milk
Shop-bought gluten-free granola often contains high FODMAP ingredients like honey, dried fruit, or cashews that can trigger IBS symptoms. When you make your own, you choose every single ingredient and keep your portions low FODMAP compliant. This matters because even certified low FODMAP foods can cause problems if you eat too much in one sitting.
The cost savings add up quickly. A bag of commercial gluten-free granola typically costs between £5 and £8 for 300 grams. Making your own brings that cost down to roughly £3 per batch, and you’ll get better quality ingredients. You’re paying for the raw materials, not the packaging and marketing.
Almond milk works perfectly in this recipe because it’s naturally low FODMAP in servings up to 250ml. It adds moisture to help the granola cluster together during baking without introducing lactose or high FODMAP dairy. The subtle nutty flavour complements the oats and seeds without overpowering them.
Customisation is where homemade granola really shines. You can adjust the sweetness level, choose your favourite nuts and seeds, and avoid ingredients that don’t work for your body. Some people tolerate pecans better than walnuts. Others prefer pumpkin seeds over sunflower seeds. Making your own means you’re never stuck with ingredients that don’t suit you.
Gather your ingredients and equipment
Start with certified gluten-free oats as your base. Regular oats are often contaminated with wheat during processing, so the certification matters if you’re sensitive to gluten. You’ll need 300 grams, which is about 3 cups.
For nuts and seeds, choose low FODMAP options in appropriate portions. Good choices include 50 grams of pecans or walnuts (roughly chopped), 40 grams of pumpkin seeds, and 30 grams of sunflower seeds. Avoid cashews and pistachios, as they’re high FODMAP even in small amounts.
Your wet ingredients include 60ml of almond milk (unsweetened works best), 80ml of maple syrup, and 60ml of a neutral oil like sunflower or light olive oil. Maple syrup is low FODMAP up to 2 tablespoons per serving and provides the sweetness that helps everything caramelise.
Add 1 teaspoon of vanilla extract and a pinch of salt to enhance the flavours. You can include 1 teaspoon of cinnamon if you enjoy it, as cinnamon is low FODMAP and adds warmth to the final taste.
Equipment-wise, you’ll need a large mixing bowl, a separate small bowl for wet ingredients, a whisk or fork, a large baking sheet (ideally 40x30cm), baking paper, and a wooden spoon or spatula for stirring. For storage, have an airtight container ready. Glass jars or plastic containers with tight-fitting lids both work well.
Selecting your almond milk
Check the label on your almond milk carefully. Choose unsweetened varieties without added high FODMAP ingredients like inulin or chicory root extract. These are sometimes added as thickeners but can trigger symptoms. Plain, unsweetened almond milk with just almonds, water, and perhaps a small amount of salt is your safest bet.
Prepare and mix your granola base
Preheat your oven to 160°C (140°C fan). This lower temperature helps the granola dry out and crisp up without burning. Line your baking sheet with baking paper to prevent sticking.
Combine all your dry ingredients in the large mixing bowl. Add the gluten-free oats, chopped nuts, and seeds. Stir them together with your hands or a spoon until everything is evenly distributed. This ensures every bite has a good mix of textures.
In the small bowl, whisk together the almond milk, maple syrup, oil, vanilla extract, and salt. The mixture should look smooth and slightly emulsified. If it separates, that’s fine, just give it another quick whisk before using.
Pour the wet mixture over the dry ingredients. Use your wooden spoon or spatula to stir everything together. The goal is to coat every oat, nut, and seed with the liquid. This takes a bit of effort. Keep stirring and folding the mixture for about 2 minutes until you don’t see any dry patches.
The consistency should look damp but not soaking wet. Each piece should glisten slightly with the oil and syrup mixture. If some areas look dry, use your hands to break up any clumps and redistribute the moisture.
Getting the texture right
The mixture won’t feel sticky at this stage. That’s normal. The maple syrup and oil create a light coating that will caramelise during baking. If your mixture feels too dry, add another tablespoon of almond milk. If it’s too wet, add 2 more tablespoons of oats.
Bake your granola to golden perfection
Spread the mixture evenly across your prepared baking sheet. Use your spatula to create an even layer about 1cm thick. Don’t press it down too firmly. You want air to circulate around the pieces so they crisp up properly.
Place the baking sheet in the preheated oven on the middle rack. Set a timer for 15 minutes. This is your first stirring point. When the timer goes off, remove the sheet from the oven and use your spatula to turn the mixture over, bringing the edges toward the centre and the centre toward the edges.
Return the sheet to the oven and bake for another 15 minutes. Stir again using the same technique. You should start to see some golden colour developing on the oats and nuts.
Bake for a final 10 to 15 minutes. Watch it closely during this last phase. The granola can go from perfectly golden to burnt quickly. You’re looking for a light golden-brown colour overall, with slightly darker edges.
The granola is ready when it looks dry and the oats have turned a toasted colour. It will still feel slightly soft when you touch it. That’s expected. It firms up considerably as it cools.
Creating clusters
If you want clusters rather than loose granola, press the mixture down gently with your spatula during the final 10 minutes of baking. After removing it from the oven, let it cool completely on the baking sheet without stirring. The maple syrup will harden as it cools, binding pieces together into clusters. Break these apart with your hands once everything is cool.
Preventing burning
Every oven runs slightly differently. If you notice the edges browning too quickly, reduce the temperature by 10°C. If your granola isn’t browning after 40 minutes, increase the temperature slightly or bake for an additional 5 minutes. The stirring intervals help prevent hot spots from burning sections of your batch.
Store and serve your homemade granola
Let your granola cool completely on the baking sheet. This takes about 45 minutes to an hour. Don’t rush this step. Warm granola stays soft and won’t crisp properly. It also creates condensation in your storage container, which makes everything soggy.
Once cool, transfer the granola to your airtight container. Glass jars work particularly well because you can see how much you have left, but any container with a tight seal will do. Store it in a cool, dry cupboard away from direct sunlight.
Your homemade gluten-free granola stays fresh for up to 3 weeks when stored properly. The oil and maple syrup act as natural preservatives, but moisture is the enemy. If you live in a humid climate, consider adding a small food-safe silica packet to your container.
Serving suggestions
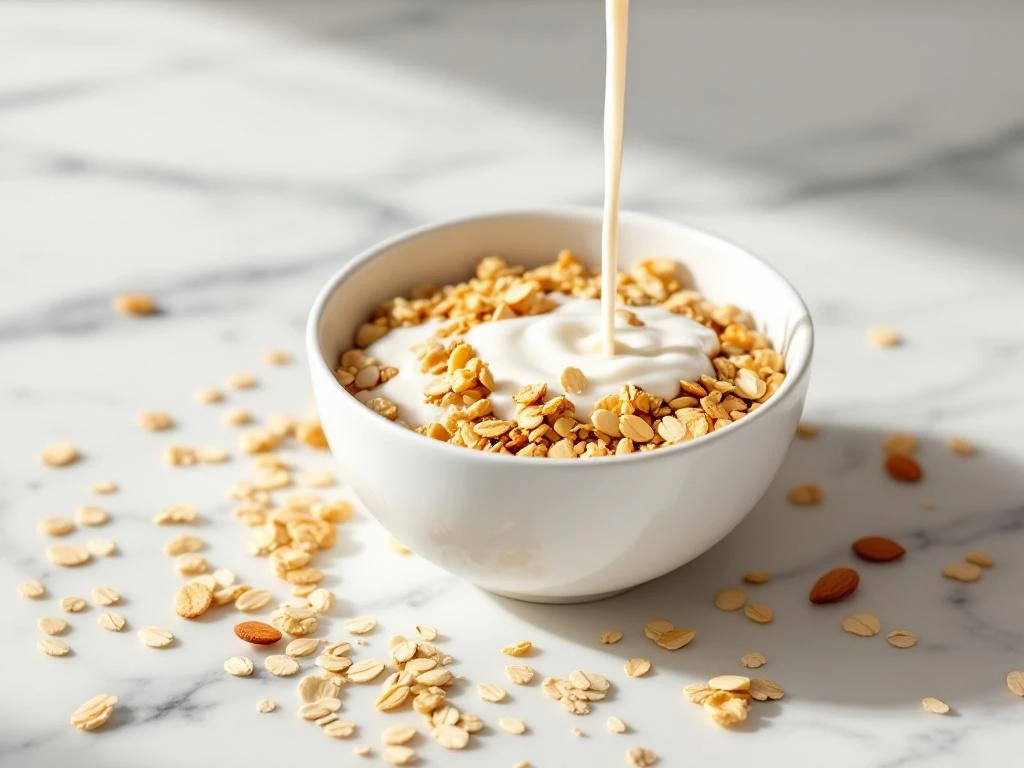
A low FODMAP serving of this granola is about 50 grams, which is roughly half a cup. Pour almond milk over it for a quick breakfast, or sprinkle it over lactose-free yoghurt. It also works as a crunchy topping for smoothie bowls or as a standalone snack when you need something satisfying.
The granola pairs beautifully with fresh berries like strawberries or blueberries, which are low FODMAP in appropriate portions. You can also add a sliced banana (firm, not overripe) if you tolerate it well. Some people enjoy it with a drizzle of extra maple syrup, though watch your total serving size if you add more sweetener.
Portion control for digestive health
Even though all the ingredients are low FODMAP, eating too much at once can still cause problems. Stick to the 50-gram serving size, especially when you’re in the elimination phase of the diet. You can always have a second serving later in the day if you’re hungry. Spreading your intake out helps your digestive system process the fibre more comfortably.
Making your own gluten-free granola with almond milk puts you in control of your breakfast routine. You know exactly what’s in your bowl, you’re saving money, and you’re supporting your digestive health with carefully chosen ingredients. The process becomes quicker each time you make it, and you’ll develop a feel for the texture and timing that works best in your kitchen. This recipe gives you a reliable foundation that you can adapt as you discover which nuts, seeds, and flavourings work best for your body.
Gluten-free granola with almond milk
Cooking Time: 40 minutes | Portions: 10 servings (50g each)
- 300g certified gluten-free oats
- 50g pecans or walnuts (chopped)
- 40g pumpkin seeds
- 30g sunflower seeds
- 60ml unsweetened almond milk
- 80ml maple syrup
- 60ml neutral oil
- 1 tsp vanilla extract
- 1 tsp cinnamon (optional)
- Pinch of salt
- Preheat oven to 160°C and line a baking sheet with paper
- Mix all dry ingredients in a large bowl
- Whisk wet ingredients together in a small bowl
- Pour wet mixture over dry and stir until evenly coated
- Spread mixture on baking sheet in an even layer
- Bake for 15 minutes, stir, bake 15 minutes, stir again
- Bake final 10-15 minutes until golden brown
- Cool completely on the sheet (45-60 minutes)
- Store in an airtight container for up to 3 weeks
- Serve 50g portions with almond milk or yoghurt
This recipe is for informational purposes only and is not medical or dietary advice. Please consult a healthcare professional before making any changes to your diet.
Related Articles
- Does Gatorade help with IBS?
- Gluten-Free Carrot Pineapple Muffins
- What are 5 signs your body has inflammation?
- How to reduce gut inflammation?
- Scrambled Eggs with Fresh Dill