Gluten-free banana pancakes make the perfect IBS-friendly breakfast when you need something satisfying that won’t upset your stomach. This recipe uses low FODMAP ingredients and simple techniques to create fluffy pancakes that taste amazing without triggering digestive symptoms. You’ll need about 20 minutes from start to finish, plus basic kitchen tools you already own. Whether you’re new to the low FODMAP diet or just looking for an easy banana pancakes recipe, these instructions will help you succeed on your first try.
Why gluten-free banana pancakes work for IBS
Bananas contain natural sugars that can trigger symptoms if you eat too much, but one medium banana per serving stays within safe low FODMAP limits. The key is proper portioning. When you stick to half a banana per person in this recipe, you get natural sweetness and binding properties without digestive distress.
Gluten-free flour blends replace wheat flour, which contains fructans that irritate sensitive digestive systems. Most gluten-free pancakes use rice flour or oat flour as a base, both of which align with FODMAP-friendly breakfast requirements. The combination creates a texture similar to traditional pancakes without the bloating or discomfort.
These lactose-free pancakes also skip regular milk in favour of alternatives that won’t cause problems. Lactose-free milk or almond milk (in small amounts) work perfectly. The result is a breakfast that feels indulgent but keeps your stomach calm throughout the morning.
Gather your ingredients and tools
For the batter, you’ll need one medium ripe banana (about 100g), 120g gluten-free flour blend, two large eggs, 180ml lactose-free milk, one tablespoon of melted lactose-free butter or coconut oil, one teaspoon of baking powder, and a pinch of salt. This makes approximately four pancakes.
Your kitchen tools are simple. Grab two mixing bowls (one for wet ingredients, one for dry), a fork or potato masher for the banana, a whisk, a non-stick frying pan or griddle, a spatula for flipping, and measuring cups and spoons for accuracy.
Substitution options give you flexibility. If you can’t find a pre-made gluten-free flour blend, combine rice flour with a small amount of tapioca starch. For the milk, unsweetened almond milk works well in portions up to 60ml per serving. If you’re avoiding eggs, try one tablespoon of ground flaxseed mixed with three tablespoons of water per egg, though this changes the texture slightly.
Mix the perfect gluten-free pancake batter
Start by mashing your banana in the larger mixing bowl. Use a fork to break it down until mostly smooth, but small lumps are fine. These add texture to your finished pancakes. Add the eggs, lactose-free milk, and melted butter to the mashed banana. Whisk everything together until well combined.
In your second bowl, combine the gluten-free flour, baking powder, and salt. Stir these dry ingredients with a fork to distribute the baking powder evenly. This step prevents clumps in your final batter.
Pour the dry mixture into the wet ingredients. Fold everything together with your whisk using gentle strokes. Stop mixing as soon as you no longer see dry flour. Overmixing creates tough, dense pancakes because it develops the starches too much. Your batter should look slightly lumpy and thick enough to slowly drop from a spoon. If it seems too thick, add one tablespoon of milk at a time until it reaches the right consistency.
Cook banana pancakes to fluffy perfection
Heat your non-stick pan over medium heat for about two minutes. Test the temperature by flicking a tiny drop of water onto the surface. It should sizzle and evaporate within a few seconds. Add a small amount of lactose-free butter or coconut oil to coat the pan lightly.
Pour about 60ml of batter (roughly a quarter cup) onto the pan for each pancake. Don’t spread it around. Let it settle into a natural circle. Watch for bubbles to form on the surface after about two minutes. When the edges look set and bubbles pop without filling back in, slide your spatula underneath and flip quickly.
Cook the second side for about 90 seconds. The pancake should feel firm when you press it gently with your spatula. The bottom will be golden brown. If you’re making multiple pancakes, keep finished ones warm on a plate covered with a clean tea towel while you cook the rest. Maintain consistent heat throughout cooking. If your pan gets too hot, the outside burns before the inside cooks through.
Troubleshoot common pancake problems
Pancakes sticking to your pan usually means it wasn’t hot enough when you started, or you didn’t use enough oil. Wait for the pan to heat properly and add a thin layer of fat before each batch. Non-stick pans work best for gluten-free recipes because the batter is more delicate.
If your batter seems too thick and your pancakes turn out dense, add lactose-free milk one tablespoon at a time. Gluten-free flour blends absorb liquid differently than wheat flour. Some blends need more moisture to create the right texture. On the other hand, runny batter that spreads too thin needs more flour. Add it gradually, one tablespoon at a time.
Flat pancakes that don’t rise happen when your baking powder is old or you overmixed the batter. Check the expiration date on your baking powder and replace it if needed. Remember to fold ingredients together gently rather than beating them vigorously.
Burning occurs when your heat is too high. Gluten-free banana pancakes need moderate heat to cook through without scorching. Turn your burner down slightly and give the inside time to set before the outside gets too dark.
Serve with low FODMAP toppings
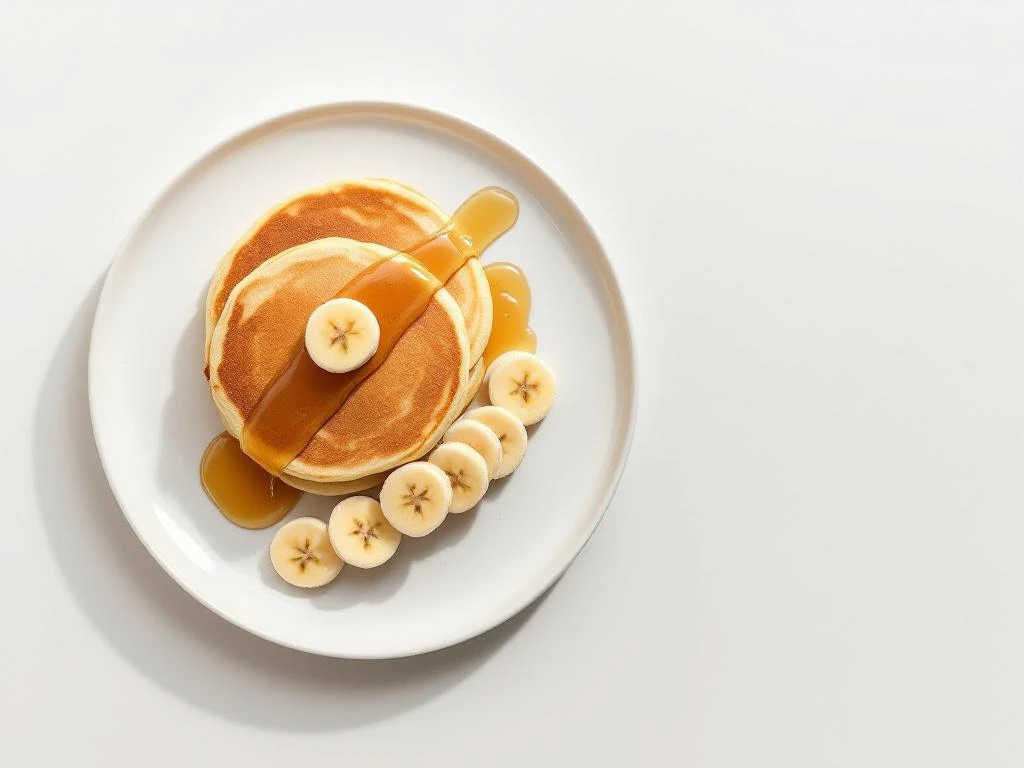
Pure maple syrup makes an excellent topping because it’s naturally low FODMAP in reasonable amounts. Drizzle about one to two tablespoons over your stack. The natural sweetness complements the banana flavour without adding digestive stress.
Lactose-free yogurt adds protein and creates a creamy contrast to the fluffy texture. Use plain or vanilla varieties and stick to about 100g per serving. You can also try a dollop of lactose-free cream cheese for richness.
For fruit toppings, stick to safe portions. A handful of blueberries (about 20 berries), a few strawberry slices (about five medium berries), or half a small kiwi fruit work well. These portions stay within low FODMAP guidelines while adding freshness and colour to your plate.
Nut butters provide healthy fats and extra flavour. Peanut butter and almond butter are both low FODMAP in servings of about two tablespoons. Warm them slightly in the microwave for easier drizzling. A sprinkle of cinnamon or a few dark chocolate chips (check they’re gluten-free) make your IBS-friendly pancakes feel special without causing problems.
These gluten-free banana pancakes prove that following a low FODMAP diet doesn’t mean boring breakfasts. The simple combination of properly portioned bananas and gluten-free ingredients creates a meal that satisfies your cravings while respecting your digestive needs. Make a double batch and freeze extras between sheets of baking paper for quick breakfasts throughout the week.
Gluten-free banana pancakes
Cooking time: 20 minutes | Portions: 2 servings (4 pancakes)
- Mash 1 medium banana (100g) in a large bowl
- Add 2 eggs, 180ml lactose-free milk, and 1 tablespoon melted lactose-free butter to the banana
- Whisk wet ingredients until combined
- In a separate bowl, mix 120g gluten-free flour blend, 1 teaspoon baking powder, and a pinch of salt
- Fold dry ingredients into wet ingredients until just combined (batter should be slightly lumpy)
- Heat a non-stick pan over medium heat and add a small amount of lactose-free butter
- Pour 60ml of batter per pancake onto the pan
- Cook for 2 minutes until bubbles form and edges set
- Flip and cook for 90 seconds until golden brown
- Serve with maple syrup, lactose-free yogurt, or low FODMAP fruit portions
This recipe is for informational purposes only and is not medical or dietary advice. Please consult a healthcare professional before making any changes to your diet.
Related Articles
- Is coffee safe on a low-FODMAP diet?
- What are the worst foods for IBS?
- Strawberry Banana Oat Smoothie
- Can I eat sourdough on a low FODMAP diet?
- Is toast better than bread for IBS?