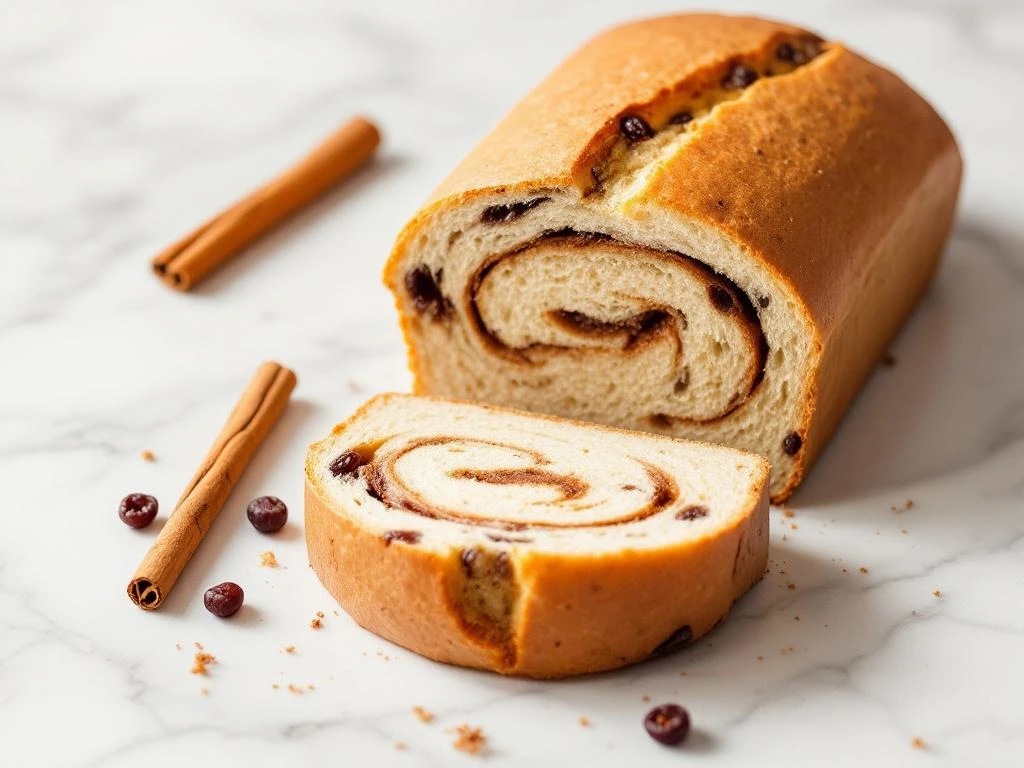
Gluten-free cinnamon raisin bread brings the comforting smell of bakery treats into your kitchen without triggering IBS symptoms. When you manage digestive sensitivities, finding bread that tastes good and feels safe can be challenging. This homemade gluten-free bread recipe uses low FODMAP modifications to give you soft, flavourful slices with a sweet cinnamon swirl.
This recipe suits intermediate bakers who have basic experience with gluten-free baking. You’ll need about 2.5 hours total, including 90 minutes of rising time. The active baking work takes around 30 minutes. You’ll need a stand mixer or hand mixer, a loaf tin, parchment paper, and basic measuring tools. The result is a tender loaf that stays fresh for several days and works beautifully for breakfast or snacks.
Why gluten-free cinnamon raisin bread works for IBS
Store-bought gluten-free breads often contain high FODMAP ingredients like honey, apple juice, or large amounts of dried fruit. These additions can trigger symptoms even when the bread itself is gluten-free. Making your own bread lets you control exactly what goes into each loaf.
This recipe uses a carefully measured amount of raisins to stay within low FODMAP serving sizes. The Monash University guidelines suggest that 13 grams of raisins (about one tablespoon) per serving remains low FODMAP. By distributing a controlled amount throughout the loaf and cutting appropriate slice sizes, you get the sweet flavour without the digestive upset.
The gluten-free flour blend creates structure without wheat, while xanthan gum acts as a binding agent to replace the elasticity that gluten normally provides. Lactose-free milk and a small amount of sugar keep the recipe FODMAP friendly. The cinnamon adds warmth and flavour without any FODMAP concerns, as spices are generally well tolerated.
Homemade gluten-free baking gives you fresher ingredients and better texture than most commercial options. You avoid the preservatives and additives that some people with IBS find problematic. The bread stays moist and tender, which is often difficult to achieve in shop-bought gluten-free products.
Gather ingredients and tools for success
For the bread dough, you’ll need 400 grams of gluten-free flour blend (one that includes xanthan gum, or add 2 teaspoons separately), 7 grams of instant yeast, 50 grams of white sugar, 1 teaspoon of salt, 240 ml of warm lactose-free milk, 80 ml of warm water, 60 ml of neutral oil (such as sunflower or rice bran oil), and 2 large eggs at room temperature.
For the cinnamon filling, gather 40 grams of brown sugar, 2 tablespoons of ground cinnamon, and 30 grams of melted lactose-free butter. You’ll also need 80 grams of raisins for the entire loaf, which works out to roughly 1 tablespoon per slice when cut into 12 portions.
Your essential tools include a stand mixer with a dough hook attachment (or a hand mixer and large bowl), one standard loaf tin (approximately 23 cm by 13 cm), parchment paper, a rolling pin, a clean tea towel, and measuring cups and spoons. Having a kitchen thermometer helps verify your liquids are at the right temperature (around 38°C) for activating yeast.
If you need substitutions, replace the eggs with 2 tablespoons of ground flaxseed mixed with 6 tablespoons of water (let sit for 5 minutes until gel-like). Swap raisins for low FODMAP dried cranberries if preferred, keeping to the same portion size. The lactose-free milk can be replaced with almond milk or another low FODMAP plant-based option.
Check that your gluten-free flour blend contains rice flour, tapioca starch, and potato starch as its base. Blends with chickpea flour or soy flour may affect texture and FODMAP content. Read labels carefully to avoid added inulin or chicory root, which are high FODMAP ingredients sometimes found in commercial flour mixes.
Preparing your workspace
Line your loaf tin with parchment paper, leaving some overhang on the sides for easy removal later. This prevents sticking, which is especially important with gluten-free doughs that can be more delicate. Warm your mixing bowl with hot water if your kitchen is cold, as gluten-free doughs rise best in warm conditions.
Prepare the gluten-free bread dough
Combine the gluten-free flour blend, instant yeast, sugar, and salt in your mixer bowl. Whisk these dry ingredients together thoroughly to distribute the yeast evenly. This step prevents clumps and ensures consistent rising throughout the dough.
In a separate container, mix the warm lactose-free milk, warm water, oil, and eggs. The liquids should feel warm to the touch but not hot (around 38°C). Temperature matters because too-hot liquid kills yeast, while too-cool liquid won’t activate it properly. Whisk until the eggs are fully incorporated and the mixture looks uniform.
Pour the wet ingredients into the dry ingredients. Mix on low speed for about 30 seconds to combine, then increase to medium speed. Beat for 3 to 4 minutes until the dough becomes smooth and slightly sticky. Gluten-free bread dough looks more like thick cake batter than traditional bread dough. It won’t form a ball like wheat-based dough does.
The proper consistency resembles thick porridge that slowly drops from a spoon. If your dough seems too dry and crumbly, add water one tablespoon at a time. If it’s too wet and runny, add flour one tablespoon at a time. Humidity levels affect gluten-free flour absorption, so minor adjustments are normal.
Scrape down the sides of the bowl with a spatula. Cover with a clean tea towel and place in a warm spot (around 24°C to 27°C). Let the dough rise for 45 to 60 minutes until it roughly doubles in size. An oven with just the light on works well as a proofing spot.
Checking dough readiness
Your dough is ready when it has visibly expanded and looks puffy. Gently press the surface with a fingertip. It should feel soft and slightly springy. Don’t worry if it doesn’t spring back completely like wheat dough would. Gluten-free dough behaves differently.
Add cinnamon swirl and raisins properly
Mix the brown sugar and cinnamon together in a small bowl. Have your melted lactose-free butter ready in another container. Measure out your 80 grams of raisins and set them aside.
Lay a large piece of parchment paper on your work surface. Lightly oil the paper to prevent sticking. Turn the risen dough out onto the prepared parchment. Using oiled hands or an oiled rolling pin, gently press and roll the dough into a rectangle roughly 30 cm by 20 cm. The dough will be soft and slightly sticky, which is correct.
Brush the melted butter evenly over the dough surface, leaving a 2 cm border along one of the long edges. This unbuttered strip helps seal the roll later. Sprinkle the cinnamon sugar mixture over the buttered area, spreading it evenly with your fingers.
Scatter the raisins across the cinnamon sugar. Distribute them as evenly as possible so each slice gets a similar amount. Press them gently into the dough so they stick and won’t fall out during rolling.
Starting from the long edge opposite your unbuttered border, carefully roll the dough into a log. Work slowly and use the parchment paper to help lift and guide the dough. Gluten-free dough tears more easily than wheat dough, so gentle handling prevents breaks. If small tears occur, pinch them together with damp fingers.
When you reach the end, pinch the seam firmly to seal. Pinch the ends closed as well. Place the roll seam-side down in your prepared loaf tin. Press gently to fit it into the corners if needed.
Second rise timing
Cover the tin with your tea towel again. Let the shaped loaf rise for another 30 to 45 minutes. It should puff up noticeably and nearly reach the top of the tin. This second rise develops the bread’s texture and helps it bake evenly.
Bake and cool for optimal texture
Preheat your oven to 180°C (350°F) about 20 minutes before your loaf finishes rising. Position the rack in the centre of the oven for even heat distribution.
When the loaf has completed its second rise, place it in the preheated oven. Bake for 45 to 50 minutes. The top should turn golden brown and feel firm when lightly pressed. An instant-read thermometer inserted into the centre should read 95°C to 98°C when the bread is fully baked.
Watch for visual cues around the 40-minute mark. The bread should pull slightly away from the tin sides and the top should look set rather than wet or shiny. If the top browns too quickly before the centre cooks through, tent it loosely with aluminium foil for the remaining baking time.
Remove the tin from the oven and let it sit for 10 minutes. This brief rest makes the bread easier to remove without breaking. Use the parchment paper overhang to lift the loaf out of the tin carefully.
Transfer the bread to a wire cooling rack. Let it cool completely before slicing, which takes about 2 hours. This cooling time is crucial for gluten-free bread. Cutting too early releases steam that makes the interior gummy and causes the structure to collapse.
The bread feels firm and springy when fully cooled. The bottom should sound hollow when tapped. Resist the temptation to slice while warm, even though it smells wonderful. Patience here makes the difference between good texture and disappointing results.
Storage guidelines
Store the completely cooled bread in an airtight container at room temperature for up to 3 days. For longer storage, slice the bread and freeze individual portions in freezer bags for up to 3 months. Toast frozen slices directly from the freezer for quick breakfasts.
Troubleshoot common gluten-free bread issues
Dense, heavy texture often means the dough didn’t rise enough or the oven temperature was too low. Make sure your yeast is fresh (check the expiration date) and your liquids are properly warmed. Give the dough adequate time to rise in both stages. Use an oven thermometer to verify your actual oven temperature matches the setting.
Crumbly slices that fall apart usually indicate too much flour or not enough binding agents. Measure flour by weight rather than volume for accuracy. If your flour blend doesn’t include xanthan gum, make sure you add it separately. The eggs also provide binding, so don’t skip them unless using the flaxseed substitute.
Lack of rise happens when yeast dies from too-hot liquids or when the dough sits in a too-cold environment. Test your liquid temperature with a thermometer. Create a warm proofing environment by placing the bowl near (not on) a warm stovetop or in an oven with just the light on.
Cinnamon filling leaking out occurs when the roll isn’t sealed properly or when too much butter is used. Press the seam firmly and place it face-down in the tin. If leaking happens during baking, it won’t ruin the bread, but clean any spills from the tin promptly after baking.
Different gluten-free flour blends absorb liquid differently. Bob’s Red Mill, King Arthur, and other brands each have unique formulations. If switching brands, you may need to adjust liquid by 2 to 3 tablespoons. Add extra liquid if the dough seems dry and crumbly. Add extra flour if it seems too wet and doesn’t hold shape.
Humid conditions make flour absorb less liquid, while dry conditions make it absorb more. In very humid weather, reduce liquid by 1 to 2 tablespoons. In dry weather, you might need an extra tablespoon of water. Keep notes about adjustments so you can replicate successful batches.
Texture expectations
Gluten-free bread has a different texture than wheat bread. It’s typically slightly more tender and less chewy. The crumb is usually tighter and less airy. These characteristics are normal and don’t indicate a problem with your baking technique.
You’ve now created a FODMAP-friendly bread that brings bakery flavours home without the digestive concerns. This recipe gives you control over ingredients and portions while delivering the satisfaction of warm, cinnamon-scented bread. The techniques you’ve learned here apply to other gluten-free baking projects, from sandwich loaves to sweet breads. Store extra slices in the freezer so you always have IBS-friendly bread ready when you need it.
Gluten-free cinnamon raisin bread
Cooking Time: 2.5 hours (30 minutes active) | Portions: 12 slices
- Dry ingredients: 400g gluten-free flour blend, 7g instant yeast, 50g white sugar, 1 tsp salt
- Wet ingredients: 240ml warm lactose-free milk, 80ml warm water, 60ml neutral oil, 2 large eggs
- Filling: 40g brown sugar, 2 tbsp cinnamon, 30g melted lactose-free butter, 80g raisins
- Step 1: Mix dry ingredients, combine with wet ingredients, beat for 3-4 minutes until smooth
- Step 2: Cover and let rise 45-60 minutes until doubled
- Step 3: Roll dough into 30cm x 20cm rectangle on oiled parchment
- Step 4: Brush with butter, sprinkle cinnamon sugar and raisins, roll into log
- Step 5: Place seam-down in lined loaf tin, let rise 30-45 minutes
- Step 6: Bake at 180°C for 45-50 minutes until golden and internal temperature reaches 95-98°C
- Step 7: Cool 10 minutes in tin, then completely on wire rack (2 hours) before slicing
- Storage: Keep in airtight container 3 days at room temperature or freeze slices up to 3 months
This recipe is for informational purposes only and is not medical or dietary advice. Please consult a healthcare professional before making any changes to your diet.
Related Articles
- What are 5 signs your body has inflammation?
- Bacon and Tomato Egg Bake
- What happens when you eat sourdough bread every day?
- Chia Seed Pudding with Raspberries
- Gluten-Free Pumpkin Walnut Bread