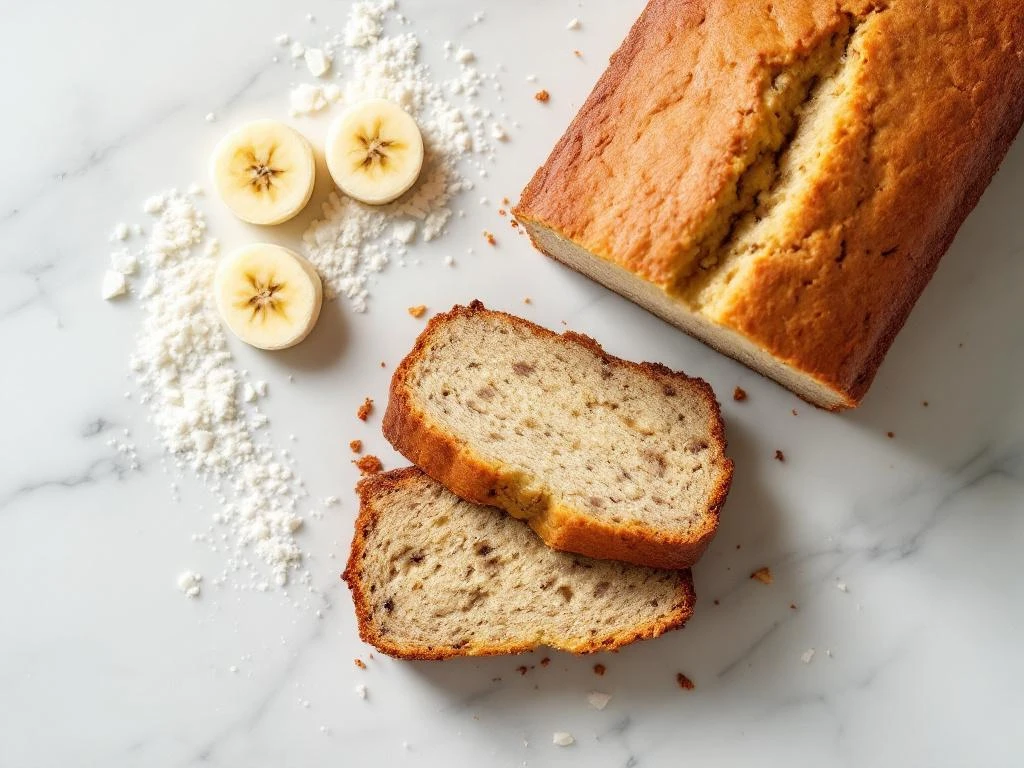
Making low FODMAP banana bread doesn’t have to mean sacrificing taste or texture. This coconut flour banana bread delivers a moist, flavourful loaf that’s gentle on your digestive system whilst satisfying your baking cravings. The recipe takes about 15 minutes to prepare and 50 minutes to bake, making it perfect for weekend meal prep or a comforting afternoon project.
You’ll need basic baking tools you probably already own, including mixing bowls, a loaf tin, and measuring cups. The ingredients are straightforward and FODMAP friendly, with ripe bananas providing natural sweetness alongside coconut flour’s unique binding properties. This guide assumes you’re comfortable with basic baking techniques, though beginners can absolutely succeed with careful attention to the mixing instructions.
Why coconut flour makes perfect low FODMAP banana bread
Coconut flour stands out as an excellent choice for FODMAP friendly baking because it’s naturally gluten free and contains no wheat, rye, or barley. Unlike traditional wheat flour that can trigger IBS symptoms, coconut flour is made from dried, ground coconut meat that’s been stripped of its fat content. This makes it gentle on sensitive digestive systems whilst providing a slightly sweet, nutty flavour that complements bananas beautifully.
The texture benefits are equally impressive. Coconut flour absorbs liquid differently than wheat flour, requiring less flour overall but more eggs and liquid ingredients. This creates a dense, moist crumb that holds together well without becoming gummy or falling apart when sliced. The high fibre content in coconut flour helps the bread stay satisfying without feeling heavy.
For IBS management, coconut flour offers practical advantages beyond its low FODMAP status. It’s naturally dairy free, making substitutions simpler when you’re avoiding lactose. The flour’s absorbent nature means your banana bread will stay fresh longer without drying out, and it won’t cause the bloating or discomfort that wheat based versions might trigger. You’re getting a bread that tastes indulgent whilst supporting your digestive health.
Gather your ingredients and tools
Start with these essential ingredients for your coconut flour banana bread. You’ll need three large ripe bananas (look for yellow skins with brown spots), 60g coconut flour, four large eggs at room temperature, 80ml maple syrup or a low FODMAP sweetener, one teaspoon vanilla extract, one teaspoon baking powder, half a teaspoon bicarbonate of soda, and a quarter teaspoon salt. Optional additions include 60ml melted coconut oil for extra moisture and 40g dairy free chocolate chips if they fit your FODMAP tolerance.
Your equipment list is straightforward. Grab two medium mixing bowls, a fork or potato masher for the bananas, measuring cups and spoons, a whisk or electric mixer, and a 23cm loaf tin. You’ll also want baking paper or coconut oil for greasing the tin, plus a toothpick or thin knife for testing doneness later.
Ingredient substitution options
Sweetener flexibility matters when you’re managing dietary needs. Maple syrup works perfectly, but you can substitute with an equal amount of rice malt syrup or a low FODMAP granulated sweetener. Avoid honey during the elimination phase, as it contains high FODMAP fructose.
For egg alternatives, the recipe becomes trickier since coconut flour relies heavily on eggs for structure. If you must avoid eggs, try replacing each egg with one tablespoon ground flaxseed mixed with three tablespoons water, though the texture will be denser. The vanilla extract can be swapped for almond extract if you prefer a different flavour profile, just use half the amount as almond extract is stronger.
Mix and prepare the coconut flour batter
Preheat your oven to 180°C and line your loaf tin with baking paper, leaving some overhang on the sides for easy removal later. This preparation step prevents sticking and makes cleanup simpler.
Mash your bananas in one bowl until mostly smooth with just a few small lumps remaining. These lumps add texture to the finished bread. Add the eggs, maple syrup, vanilla extract, and melted coconut oil if using. Whisk everything together until well combined and slightly frothy. This should take about one minute of vigorous whisking.
In your second bowl, combine the coconut flour, baking powder, bicarbonate of soda, and salt. Whisk these dry ingredients together to break up any clumps in the coconut flour. This step ensures even distribution and prevents pockets of flour in your finished bread.
Combining wet and dry ingredients
Pour the dry mixture into the wet ingredients. Stir gently with a spatula or wooden spoon until just combined. The batter will look thicker than traditional banana bread batter because coconut flour absorbs significantly more liquid than wheat flour. You want a thick, pourable consistency similar to porridge.
Avoid overmixing at this stage. Stop stirring as soon as you no longer see dry flour streaks. Overmixing can make the bread tough rather than tender. If you’re adding chocolate chips or other mix-ins, fold them in now with just a few gentle strokes.
Pour the batter into your prepared loaf tin and smooth the top with your spatula. The batter should fill the tin about two thirds full, leaving room for rising during baking.
Bake and test for perfect doneness
Place your loaf tin in the centre of the preheated oven. Bake for 45 to 50 minutes without opening the oven door for at least the first 30 minutes. Opening too early can cause the bread to sink in the middle.
Watch for these visual cues as baking progresses. The top should turn golden brown and develop small cracks. The edges will start pulling slightly away from the tin sides. At around 45 minutes, the bread should look set on top rather than wet or jiggly.
Testing for doneness
Insert a toothpick or thin knife into the centre of the loaf at the 45 minute mark. It should come out clean or with just a few moist crumbs attached. If you see wet batter, continue baking and check again every five minutes. Coconut flour banana bread can go from perfectly done to overbaked quickly, so check frequently once you’re past the 45 minute mark.
Another doneness indicator is the gentle press test. Lightly press the top centre of the bread with your finger. It should spring back rather than leaving an indentation. If it feels spongy and bounces back, it’s done.
Remove the tin from the oven and place it on a wire cooling rack. Let the bread cool in the tin for 15 minutes. This cooling period allows the structure to set, preventing crumbling when you remove it. After 15 minutes, use the baking paper overhang to lift the bread out of the tin. Place it directly on the cooling rack and let it cool completely before slicing, about one hour. Cutting too early releases steam and can make the texture gummy.
Store and serve your banana bread
Once completely cool, your coconut flour banana bread stays fresh at room temperature for two to three days. Wrap it tightly in cling film or store it in an airtight container to prevent drying. The bread actually tastes better the next day as the flavours develop and the texture becomes more cohesive.
For longer storage, refrigeration extends freshness to about one week. Wrap individual slices in cling film and stack them in a container. This makes grabbing a quick breakfast or snack easier. Bring slices to room temperature before eating, or warm them slightly in the microwave for 15 to 20 seconds.
Freezing for extended storage
Freeze your banana bread for up to three months without quality loss. Slice the entire loaf before freezing so you can remove individual portions as needed. Wrap each slice in cling film, then place all wrapped slices in a freezer bag with the air pressed out. Label with the date so you track freshness.
Thaw frozen slices at room temperature for about 30 minutes, or microwave them on low power for 30 to 40 seconds. You can also toast frozen slices directly from the freezer for a warm, slightly crispy texture.
Serving suggestions
Enjoy your IBS friendly banana bread plain, or top it with low FODMAP spreads like peanut butter, almond butter, or a thin layer of lactose free cream cheese. A drizzle of extra maple syrup adds sweetness without triggering symptoms. For breakfast, pair a slice with a handful of blueberries and a cup of lactose free yoghurt to create a balanced, gut friendly meal.
The bread also works well as an afternoon snack with a cup of peppermint tea, which can be soothing for digestive discomfort. You’ve created a versatile, healthy banana bread that fits your dietary needs without compromise.
Coconut flour banana bread
Cooking Time: 50 minutes | Portions: 10 slices
- Preheat oven to 180°C and line a 23cm loaf tin with baking paper
- Mash 3 large ripe bananas until mostly smooth
- Whisk together mashed bananas, 4 eggs, 80ml maple syrup, 1 teaspoon vanilla extract, and 60ml melted coconut oil (optional)
- In a separate bowl, combine 60g coconut flour, 1 teaspoon baking powder, ½ teaspoon bicarbonate of soda, and ¼ teaspoon salt
- Pour dry ingredients into wet ingredients and stir until just combined
- Pour batter into prepared loaf tin
- Bake for 45 to 50 minutes until a toothpick inserted in the centre comes out clean
- Cool in tin for 15 minutes, then transfer to a wire rack to cool completely
- Store wrapped at room temperature for 2 to 3 days, refrigerate for up to 1 week, or freeze for up to 3 months
This recipe is for informational purposes only and is not medical or dietary advice. Please consult a healthcare professional before making any changes to your diet.
Related Articles
- Egg White Omelet with Bell Peppers
- Turkey Sausage and Egg Scramble
- Blueberry Walnut Overnight Oats
- What are 5 signs your body has inflammation?
- Is coffee safe on a low-FODMAP diet?