Baking a delicious treat while managing IBS symptoms can feel impossible. This quinoa banana bread slice changes that. You’ll create a moist, flavourful FODMAP friendly baking option that doesn’t trigger digestive issues. This recipe works for beginners with basic baking skills. Expect to spend about 15 minutes on prep and 45 minutes baking. You’ll need a mixing bowl, loaf tin, measuring cups, and common pantry ingredients. The result is a healthy banana bread that tastes indulgent without the bloating or discomfort.
Why quinoa banana bread works for low FODMAP diets
Quinoa serves as a brilliant alternative to wheat flour. It’s naturally gluten free and contains no FODMAPs. Traditional wheat bread triggers IBS symptoms because it contains fructans. These short-chain carbohydrates ferment in your gut and cause bloating, pain, and other digestive troubles.
This gluten free banana bread uses either quinoa flour or cooked quinoa as the base. Both options provide protein, fibre, and essential minerals without upsetting your stomach. The texture stays moist and tender, similar to conventional banana bread. You won’t feel like you’re missing out on anything.
The recipe controls banana portions carefully. Bananas become high FODMAP in large amounts, but a small serving remains safe. This IBS friendly dessert balances taste with digestive comfort. You get the sweet banana flavour you crave without paying for it later with symptoms.
Gather your low FODMAP ingredients and tools
Start by collecting everything you need. Having ingredients ready makes the process smooth and quick.
Essential ingredients:
- 150g quinoa flour or 200g cooked quinoa (cooled)
- 1 medium firm banana (about 100g, not overripe)
- 2 large eggs
- 60ml lactose free milk
- 80ml maple syrup or rice malt syrup
- 60ml light olive oil or melted coconut oil
- 1 teaspoon vanilla extract
- 1 teaspoon baking powder
- ½ teaspoon bicarbonate of soda
- ½ teaspoon cinnamon
- Pinch of salt
Required tools:
- 20cm loaf tin
- Large mixing bowl
- Medium mixing bowl
- Fork or potato masher
- Measuring cups and spoons
- Wooden spoon or spatula
- Baking paper
Choose firm bananas over very ripe ones. Overripe bananas contain higher FODMAP levels. The small amount used here keeps this lactose free banana bread safe for sensitive stomachs.
Ingredient substitution tips
Can’t find quinoa flour? Cook quinoa from scratch and let it cool completely. The texture will be slightly different but still delicious. For the sweetener, stick with maple syrup or rice malt syrup. Honey is high FODMAP and should be avoided. Regular milk won’t work either. Use lactose free milk, almond milk, or another plant-based alternative.
Prepare the quinoa base for optimal texture
Your quinoa needs proper preparation for the best quinoa bread recipe results. The method differs slightly depending on whether you’re using flour or cooked quinoa.
Using quinoa flour
Measure 150g of quinoa flour into your large mixing bowl. Add the baking powder, bicarbonate of soda, cinnamon, and salt. Whisk these dry ingredients together until evenly distributed. This takes about 30 seconds. You’ll see no clumps or streaks in the mixture.
Using cooked quinoa
Rinse 75g of dry quinoa under cold water using a fine mesh strainer. This removes the natural coating that can taste bitter. Combine the rinsed quinoa with 150ml water in a small pot. Bring to a boil, then reduce heat to low. Cover and simmer for 15 minutes until the water is absorbed.
Remove from heat and let it sit covered for 5 minutes. Fluff with a fork and spread on a plate to cool completely. This cooling step matters. Hot quinoa will cook your eggs when you mix everything together. Wait at least 20 minutes before using.
Once cooled, measure 200g of cooked quinoa. Place it in a food processor and pulse 8 to 10 times. You want a slightly chunky texture, not a smooth paste. The small pieces will distribute evenly through your batter.
Mix and combine ingredients for perfect consistency
Proper mixing creates the ideal texture for this quinoa banana bread. The order matters, so follow these steps carefully.
Peel your banana and place it in the medium bowl. Mash it thoroughly with a fork until mostly smooth. Small lumps are fine, but you don’t want large chunks. This takes about 2 minutes of mashing.
Add the eggs to the mashed banana. Whisk them together until combined. Pour in the lactose free milk, oil, maple syrup, and vanilla extract. Whisk everything for about 30 seconds until the mixture looks uniform.
Create a well in the centre of your dry ingredients (or processed quinoa). Pour the wet mixture into this well. Use a wooden spoon or spatula to fold the ingredients together. Start from the centre and work outward in a circular motion.
Important mixing tip: Stop as soon as you no longer see dry flour or quinoa. Overmixing develops gluten-like proteins in the eggs and makes the bread tough. The batter should look slightly lumpy. This is exactly what you want for tender, moist bread.
Success check
Your batter should be thick but pourable. It will fall slowly off your spoon rather than running off quickly. The colour will be light brown with visible banana pieces. If using cooked quinoa, you’ll see small grain pieces throughout.
Bake and test for doneness
Preheat your oven to 180°C (160°C fan). Line your loaf tin with baking paper, leaving some overhang on the long sides. This makes removing the bread much easier later.
Pour the batter into the prepared tin. Use your spatula to spread it evenly and smooth the top. Tap the tin gently on your counter twice. This releases any large air bubbles trapped in the batter.
Place the tin in the centre of your preheated oven. Bake for 45 to 50 minutes. The exact time depends on your oven and the depth of your tin.
Visual cues for doneness
Watch for these signs that your low FODMAP banana bread is ready. The top should turn golden brown. The edges will pull away slightly from the tin sides. The centre should look set rather than wet or jiggly.
At the 45-minute mark, perform the toothpick test. Insert a wooden skewer or toothpick into the centre of the loaf. Pull it straight out and examine it. A few moist crumbs clinging to the stick are perfect. Wet batter means it needs more time. If you see wet batter, bake for another 5 minutes and test again.
Cooling procedure
Remove the tin from the oven when the toothpick comes out with just crumbs. Let it sit in the tin for 10 minutes. This resting time allows the structure to firm up. The bread will be too fragile to move immediately.
After 10 minutes, use the baking paper overhang to lift the bread out of the tin. Place it on a wire cooling rack. Let it cool for at least 30 minutes before slicing. Cutting too early will give you a gummy texture. The cooling time lets moisture distribute evenly through the loaf.
Store and serve your quinoa banana bread
Proper storage keeps your healthy banana bread fresh for days. Once completely cooled, wrap the loaf tightly in cling film or place it in an airtight container.
Room temperature storage
Store at room temperature for up to 3 days. Keep it away from direct sunlight or heat sources. The bread stays moist and ready to eat. This works well if you’ll finish it quickly.
Refrigeration
Refrigerate for up to 7 days in an airtight container. The cold temperature extends freshness but can make the texture slightly firmer. Let slices come to room temperature for 10 minutes before eating, or warm them gently in the microwave for 15 seconds.
Freezing for meal prep
Slice the cooled bread into individual portions. Wrap each slice in cling film, then place all wrapped slices in a freezer bag. Label with the date. Freeze for up to 3 months. Thaw individual slices at room temperature for about 30 minutes, or microwave from frozen for 30 to 45 seconds.
Serving suggestions
Enjoy your quinoa banana bread plain or with these FODMAP friendly toppings. Spread with peanut butter (check it contains no added sweeteners). Add a thin layer of lactose free cream cheese. Serve alongside your morning coffee or tea.
Portion control matters: One slice (about 1/10 of the loaf) keeps you within safe FODMAP limits. The controlled banana content means you can enjoy this treat without triggering symptoms. Don’t eat multiple slices in one sitting, as the banana and sweetener amounts add up.
Serving temperature
This bread tastes wonderful at room temperature. You can also warm slices slightly for a comforting treat. Toast lightly in a toaster or warm in the oven at 150°C for 5 minutes. The gentle heat brings out the cinnamon aroma and makes the texture even more tender.
You’ve now mastered a genuinely delicious FODMAP friendly baking recipe. This quinoa banana bread slice proves that managing IBS doesn’t mean giving up treats you love. The combination of safe ingredients and proper technique creates something you’ll want to make again and again. Your digestive system will thank you, and your taste buds will be just as happy.
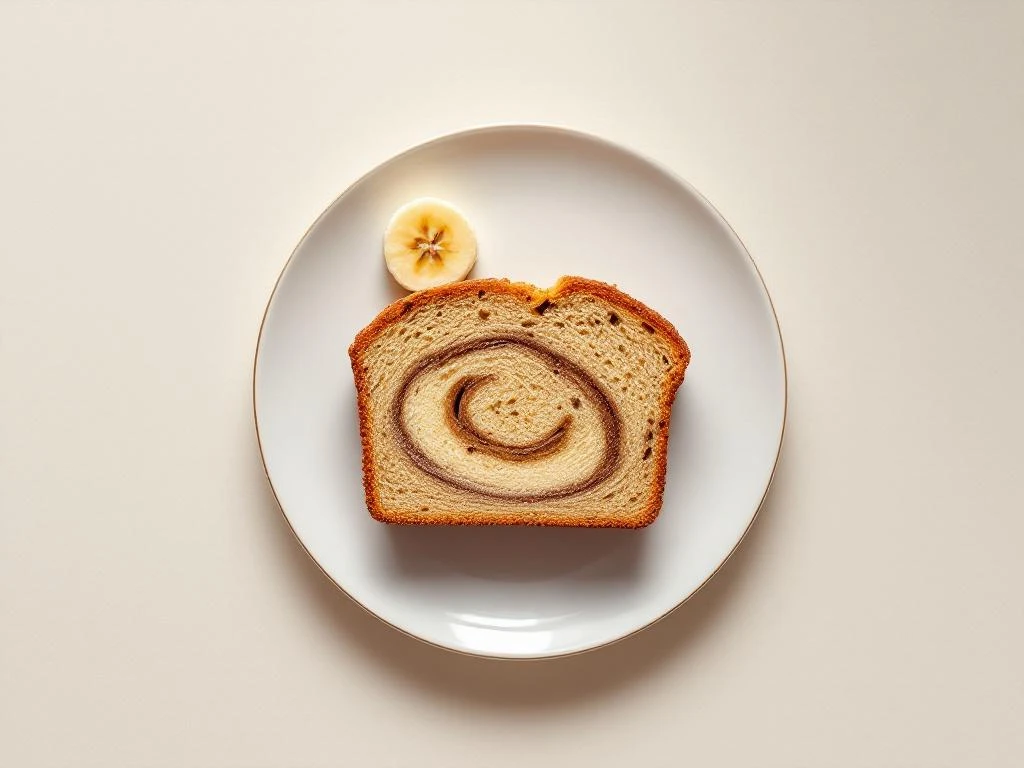
Quinoa banana bread slice
Cooking Time: 45-50 minutes | Portions: 10 slices
Ingredients:
- 150g quinoa flour (or 200g cooked quinoa, cooled)
- 1 medium firm banana (100g)
- 2 large eggs
- 60ml lactose free milk
- 80ml maple syrup or rice malt syrup
- 60ml light olive oil
- 1 teaspoon vanilla extract
- 1 teaspoon baking powder
- ½ teaspoon bicarbonate of soda
- ½ teaspoon cinnamon
- Pinch of salt
Method:
- Preheat oven to 180°C (160°C fan) and line a 20cm loaf tin with baking paper
- If using cooked quinoa, rinse 75g dry quinoa, cook with 150ml water for 15 minutes, cool completely, then pulse in food processor
- Mix quinoa flour (or processed quinoa) with baking powder, bicarbonate of soda, cinnamon, and salt in large bowl
- Mash banana in separate bowl, add eggs, milk, oil, syrup, and vanilla, whisk until combined
- Pour wet ingredients into dry ingredients, fold gently until just combined (batter will be lumpy)
- Pour batter into prepared tin, smooth top, tap to release air bubbles
- Bake 45-50 minutes until golden and toothpick inserted in centre comes out with moist crumbs
- Cool in tin for 10 minutes, then transfer to wire rack to cool completely
- Store wrapped at room temperature for 3 days, refrigerate for 7 days, or freeze slices for 3 months
- Serve one slice per portion to maintain low FODMAP compliance
This recipe is for informational purposes only and is not medical or dietary advice. Please consult a healthcare professional before making any changes to your diet.
Related Articles
- Which fruit is highest in FODMAPs?
- What is the 14 day gut reset?
- Lactose-Free Strawberry Protein Shake
- How to calm down IBS in the morning?
- Coconut Yogurt Granola Parfait