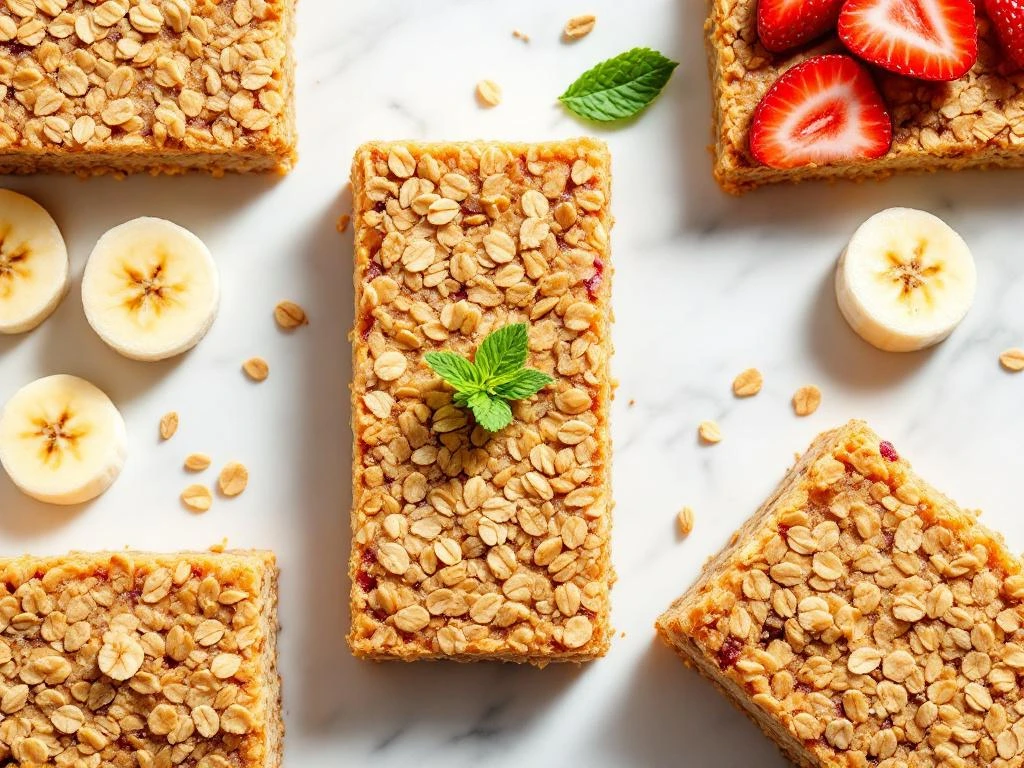
Making snacks that taste good and support your digestive health can feel challenging when you’re managing IBS. These strawberry banana oat bars solve that problem with simple, low FODMAP ingredients that work with your body instead of against it. You’ll create a batch of homemade breakfast bars that are gentle on your stomach and perfect for busy mornings or afternoon snacks.
This recipe works for beginners with basic kitchen skills. You’ll need about 30 minutes of active preparation time, plus 2 hours for the bars to set in the refrigerator. The process involves mixing, layering, and chilling rather than complex baking techniques.
You’ll need a food processor or blender, a square baking pan, measuring cups, and basic mixing bowls. All ingredients are available at regular supermarkets, and we’ll guide you through proper portions to keep everything FODMAP friendly.
Why strawberry banana oat bars work for IBS
These bars use ingredients that research and clinical experience have shown to be gentle on sensitive digestive systems. Oats provide soluble fibre that many people with IBS tolerate well, helping to regulate digestion without triggering symptoms. The key is using certified gluten free oats and sticking to recommended portion sizes.
Strawberries and bananas both fall within safe FODMAP limits when measured properly. A firm, slightly unripe banana contains less fermentable sugars than a fully ripe one, making it easier to digest. Strawberries add natural sweetness and vitamin C without the high fructose content found in some other fruits.
Store bought bars often hide problematic ingredients like high fructose corn syrup, inulin, chicory root, or excess dried fruit. These additives can trigger IBS symptoms even when the main ingredients seem safe. Making your own healthy oat bars recipe gives you complete control over every ingredient that goes into your digestive friendly snacks.
The combination creates an IBS friendly snack bar that provides sustained energy without causing bloating or discomfort. You’ll avoid the guesswork that comes with reading complicated ingredient labels at the shop.
Gather your ingredients and tools
For the oat base, measure out 200g of certified gluten free rolled oats, 60ml of maple syrup, 60ml of melted coconut oil, and a pinch of salt. You can substitute the coconut oil with lactose free butter if you prefer, keeping the same measurements.
The strawberry banana filling requires 150g of fresh strawberries (about 10 medium berries), one firm banana (approximately 100g when peeled), 2 tablespoons of chia seeds, and 1 tablespoon of maple syrup. The chia seeds help thicken the filling naturally without adding artificial ingredients.
Your essential tools include a food processor for breaking down the oats, a medium saucepan for cooking the fruit mixture, a 20cm square baking pan, parchment paper for easy removal, and a sturdy spatula for pressing layers. If you don’t have a food processor, a strong blender works just as well for this easy oat bar recipe.
Line your baking pan with parchment paper before you start. Let the paper hang over the edges so you can lift the finished bars out easily. This simple step prevents sticking and makes cutting clean slices much simpler.
Prepare the oat base mixture
Add your gluten free oats to the food processor and pulse 8 to 10 times until they break down into a coarse flour. Some larger oat pieces should remain for texture. You want a mix of fine and chunky bits rather than a completely smooth powder.
Transfer the processed oats to a mixing bowl. Pour in the melted coconut oil and maple syrup, then add your pinch of salt. Stir everything together until the mixture looks like wet sand and holds together when you squeeze it in your hand.
Press two thirds of this mixture firmly into your prepared pan. Use the back of a measuring cup or the bottom of a glass to compress it evenly across the base. The layer should be about 1cm thick and feel solid when you press it. This firm base prevents your bars from falling apart when you cut them later.
Set the remaining one third of the oat mixture aside in the bowl. You’ll use this for the top layer after adding your fruit filling. Cover it with a tea towel so it doesn’t dry out while you prepare the strawberry banana layer.
Create the strawberry banana filling
Rinse your strawberries and remove the green tops. Slice them into quarters to help them break down faster during cooking. Peel your banana and slice it into rounds about 1cm thick. Using a firm banana rather than an overripe one keeps the FODMAP content appropriate and prevents the filling from becoming too sweet.
Place the strawberries and banana in your saucepan over medium heat. Add the tablespoon of maple syrup and stir gently. The fruit will start releasing liquid within 2 to 3 minutes. Let it cook for 8 to 10 minutes, stirring occasionally and mashing the fruit with your spoon as it softens.
When the mixture looks jammy and most of the liquid has cooked off, remove it from the heat. Stir in your chia seeds thoroughly. The mixture will seem quite wet at this point, but the chia seeds will absorb moisture and thicken everything as it cools.
Let the filling cool for 10 minutes before using it. This cooling period allows the chia seeds to work their magic and prevents the hot filling from making your oat base soggy. The mixture should be spreadable but not runny when you’re ready to assemble your lactose free oat bars.
Assemble and set your oat bars
Spread your cooled strawberry banana filling evenly over the pressed oat base in your pan. Use a spatula to smooth it right to the edges, creating an even layer about 0.5cm thick. Getting the filling level helps your bars hold together better when you slice them.
Crumble the reserved oat mixture over the top of the fruit layer. Distribute it evenly across the surface, then press down gently with your hands. You want this top layer to stick to the filling but still maintain some texture. Don’t press as firmly as you did with the base layer.
Cover the pan with cling film and place it in the refrigerator. The bars need at least 2 hours to set properly, though leaving them overnight works even better. The cold temperature firms up the coconut oil and allows the chia seeds to fully bind everything together.
These are no bake oat bars, so you skip the oven entirely. This method preserves more nutrients in the fruit and keeps your kitchen cooler. It also means less washing up and a simpler process overall.
When the bars feel firm to touch, lift them out using the parchment paper overhang. Place them on a cutting board. Use a sharp knife and wipe it clean between cuts for the neatest slices. Cut into 12 equal portions for proper serving sizes.
Store and enjoy your bars throughout the week
Keep your strawberry banana oat bars in an airtight container in the refrigerator. They stay fresh for up to 5 days when stored properly. The cool temperature maintains the right texture and prevents the fruit filling from spoiling.
Stack the bars with parchment paper between layers if you need to store them in multiple levels. This prevents them from sticking together and makes grabbing one quick and easy. You can also wrap individual bars in baking paper for convenient grab and go portions.
One bar makes an appropriate serving size for a low FODMAP snack. Eating two bars in one sitting might push you over recommended limits for bananas and oats, potentially triggering symptoms. Space out your portions throughout the day if you want more than one.
These homemade breakfast bars work brilliantly for meal prep. Make a batch on Sunday and you’ll have ready made snacks for the entire work week. They’re sturdy enough to pack in your bag without falling apart, making them perfect for busy mornings or afternoon energy dips.
You can freeze these bars for longer storage. Wrap each one individually in cling film, then place them all in a freezer bag. They keep for up to 3 months frozen. Thaw overnight in the refrigerator or let one sit at room temperature for 30 minutes before eating.
The texture stays pleasantly chewy when refrigerated and becomes slightly firmer when frozen then thawed. Both ways taste delicious and provide the same digestive benefits. Choose the storage method that fits your meal planning style and how quickly you’ll eat them.
Strawberry banana oat bars
Preparation time: 30 minutes | Setting time: 2 hours | Portions: 12 bars
Ingredients:
- 200g certified gluten free rolled oats
- 120ml maple syrup (divided)
- 60ml melted coconut oil or lactose free butter
- Pinch of salt
- 150g fresh strawberries
- 1 firm banana (approximately 100g peeled)
- 2 tablespoons chia seeds
Method:
- Line a 20cm square pan with parchment paper
- Process oats in food processor until coarsely ground
- Mix oats with 60ml maple syrup, melted oil, and salt
- Press two thirds of mixture into pan base firmly
- Cook sliced strawberries and banana with 1 tablespoon maple syrup for 8 to 10 minutes
- Stir chia seeds into cooked fruit and cool for 10 minutes
- Spread filling over oat base evenly
- Crumble remaining oat mixture on top and press gently
- Refrigerate for minimum 2 hours until firm
- Cut into 12 equal portions and store in refrigerator up to 5 days
This recipe is for informational purposes only and is not medical or dietary advice. Please consult a healthcare professional before making any changes to your diet.