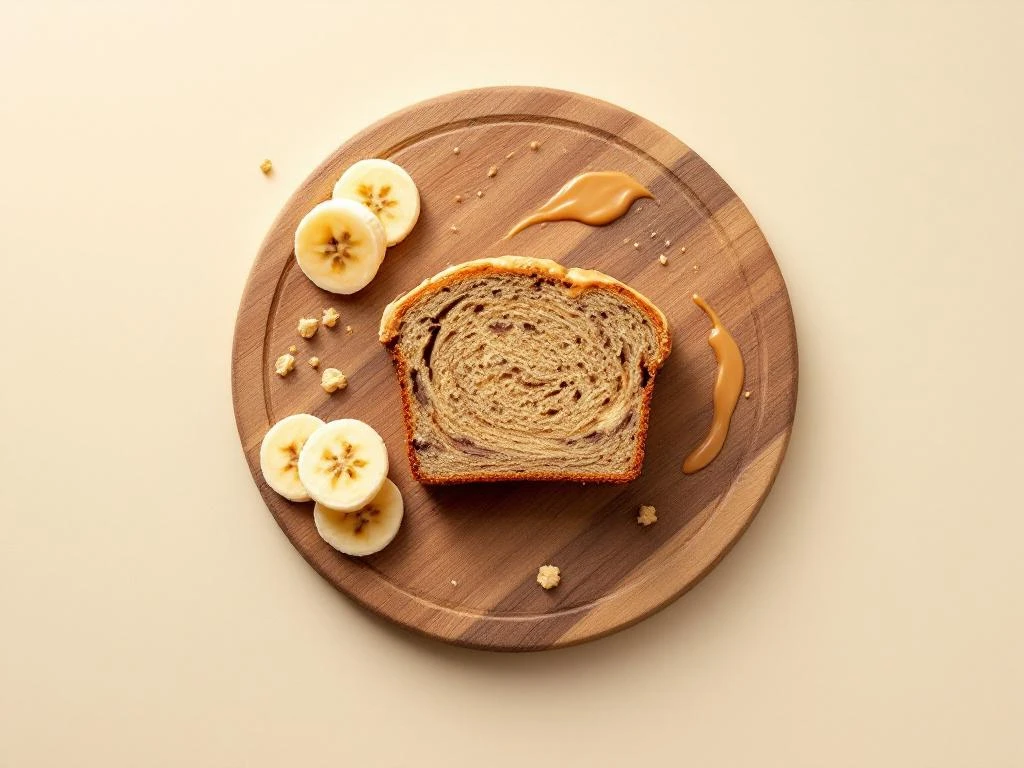
Craving warm, comforting banana bread but worried about IBS symptoms? This peanut butter banana bread recipe combines gut-friendly ingredients to give you all the flavour without the digestive distress. Perfect for beginners, this simple banana bread recipe takes about 15 minutes to prepare and 55 minutes to bake. You’ll need basic baking equipment, a few low FODMAP ingredients, and ripe bananas. By the end, you’ll have a delicious loaf that satisfies your sweet tooth whilst keeping your stomach happy.
Why peanut butter banana bread works for IBS
This peanut butter banana bread brings together carefully selected low FODMAP ingredients that won’t trigger your digestive symptoms. Ripe bananas are naturally low in FODMAPs when you stick to firm, slightly spotty ones rather than overripe versions. They provide natural sweetness and moisture, reducing the need for high FODMAP sweeteners.
Peanut butter adds protein and healthy fats whilst remaining FODMAP friendly in moderate amounts. The combination creates a satisfying texture and rich flavour that makes this IBS friendly banana bread feel indulgent rather than restrictive. Using gluten free flour and lactose free alternatives means you’re avoiding common trigger ingredients without sacrificing taste or texture.
The beauty of this FODMAP friendly baking approach is that it proves you don’t need to compromise on your favourite treats. This healthy banana bread satisfies cravings for something sweet and comforting whilst keeping your gut calm. You get all the pleasure of traditional banana bread without the worry.
Gather your low FODMAP ingredients and tools
Success starts with having everything ready before you begin mixing. Here’s what you’ll need for this easy banana bread:
Low FODMAP ingredients:
- 3 firm, ripe bananas with light brown spots (not black or mushy)
- 120g smooth peanut butter (check labels for no added garlic or onion)
- 2 large eggs at room temperature
- 100g brown sugar or suitable low FODMAP sweetener
- 60ml lactose free milk or suitable plant milk
- 200g gluten free flour blend (look for blends without chickpea or lupin flour)
- 1.5 teaspoons baking powder
- 0.5 teaspoon bicarbonate of soda
- 0.5 teaspoon salt
- 60ml neutral oil (such as rice bran or light olive oil)
- 1 teaspoon vanilla extract
Essential baking tools:
- 23cm x 13cm loaf tin (9 inch x 5 inch)
- Two medium mixing bowls
- Fork or potato masher for bananas
- Measuring cups and spoons
- Whisk or wooden spoon
- Spatula for folding
- Baking paper or oil for greasing
- Toothpick or skewer for testing
Check that your gluten free flour blend contains xanthan gum or another binder. If it doesn’t, add half a teaspoon to help the bread hold together properly. Make sure your baking powder and bicarbonate of soda are fresh (less than six months old) for the best rise.
Prepare your bananas and wet ingredients
Start by preheating your oven to 175°C (350°F). Line your loaf tin with baking paper or grease it well with oil. This prevents sticking and makes removing the finished loaf much easier.
Choose bananas that are yellow with small brown spots. They should feel slightly soft when you press them gently but not mushy. Overripe bananas with lots of black spots contain higher FODMAP levels, so stick to the moderately ripe ones. Peel your three bananas and place them in a medium bowl.
Mash the bananas with a fork until mostly smooth. Some small lumps are fine and actually add nice texture to your peanut butter bread recipe. You want about 300g of mashed banana. Add the peanut butter whilst the bananas are still in the bowl and mix them together until well combined.
Crack in your two eggs and whisk everything together. The mixture will look a bit lumpy at this stage, which is normal. Add the brown sugar, lactose free milk, oil, and vanilla extract. Whisk until you have a smooth, well combined mixture. The peanut butter should be fully incorporated with no visible streaks.
Let this mixture sit whilst you prepare your dry ingredients. Room temperature ingredients combine more easily and create better texture in your finished loaf.
Mix your dry ingredients properly
Take your second mixing bowl and add the gluten free flour. Gluten free flour can settle and compact during storage, so fluff it up with a fork before measuring. Spoon it into your measuring cup rather than scooping directly from the bag, which packs it down and gives you too much flour.
Add the baking powder, bicarbonate of soda, and salt to the flour. Use a whisk to mix these dry ingredients together for at least 30 seconds. This step is more important than it seems. Proper mixing distributes the leavening agents evenly throughout the flour, ensuring your bread rises uniformly.
Look through the mixture to check for any clumps, especially in the baking powder. Break up any lumps with the back of a spoon. Gluten free flour can also have lumps, so whisk thoroughly. If you’re using a flour blend that tends to be lumpy, sift it before measuring.
Your dry mixture should look uniform in colour with no visible streaks of white baking powder or darker flour patches. Set this bowl aside and get ready to combine everything.
Combine and bake your banana bread
Pour the dry ingredients into the bowl with your wet banana mixture. Here’s where technique matters for this gluten free banana bread. Use a spatula or wooden spoon to fold the ingredients together gently. Start from the bottom of the bowl and bring the mixture up and over itself.
Stop mixing as soon as you no longer see dry flour. The batter should look thick and slightly lumpy. Overmixing gluten free batter can make your bread dense and gummy, so resist the urge to keep stirring until it’s perfectly smooth. A few small lumps are better than an overworked batter.
Scrape the batter into your prepared loaf tin. Use your spatula to spread it evenly, paying special attention to the corners. Tap the tin gently on your counter twice to release any air bubbles. This helps prevent large holes in your finished loaf.
Place the tin in the centre of your preheated oven. Bake for 50 to 55 minutes without opening the oven door for at least the first 40 minutes. Opening it early can cause the bread to sink in the middle as it loses heat.
The top should turn golden brown and may crack slightly down the centre, which is normal and actually looks quite attractive. You’ll notice the edges start to pull away from the sides of the tin slightly. Your kitchen will smell amazing at this point.
How do you know when banana bread is done?
Visual cues give you the first indication that your lactose free banana bread is ready. The top should be golden brown with a slightly darker crust. Light golden means it needs more time. The surface should spring back when you press it gently with your finger.
Check the edges of the loaf. They should have pulled away from the tin by about 3mm all around. If the batter still looks wet where it meets the tin, give it another 5 minutes.
The toothpick test is your most reliable method. Insert a wooden toothpick or skewer into the centre of the loaf, going straight down to the bottom. Pull it out and look at it carefully. It should come out clean or with just a few moist crumbs attached. Wet batter means it needs more time. Test in two or three spots to be sure.
If you have a kitchen thermometer, the internal temperature should read 95°C to 98°C (200°F to 205°F) when fully baked. Insert the thermometer into the centre of the loaf for an accurate reading.
Once done, remove the tin from the oven and place it on a wire rack. Let the bread cool in the tin for 15 minutes. This cooling time is essential. Trying to remove it too soon will cause it to break apart because gluten free baked goods are more fragile when hot.
After 15 minutes, run a knife around the edges if needed and lift the bread out using the baking paper. Let it cool completely on the wire rack before slicing, ideally for at least 30 minutes. Warm bread cuts messily and crumbles easily. Fully cooled bread slices cleanly and has better texture.
Store your finished loaf in an airtight container at room temperature for up to three days, or slice and freeze portions for up to three months. This simple banana bread recipe makes a wonderful breakfast, snack, or dessert that works with your low FODMAP lifestyle.
Peanut butter banana bread
Cooking Time: 55 minutes | Portions: 10 slices
- Preheat oven to 175°C and prepare a 23cm x 13cm loaf tin
- Mash 3 firm, ripe bananas with 120g peanut butter
- Mix in 2 eggs, 100g brown sugar, 60ml lactose free milk, 60ml oil, and 1 teaspoon vanilla
- Whisk together 200g gluten free flour, 1.5 teaspoons baking powder, 0.5 teaspoon bicarbonate of soda, and 0.5 teaspoon salt
- Fold dry ingredients into wet ingredients until just combined
- Pour batter into prepared tin and bake for 50 to 55 minutes
- Test with toothpick (should come out clean or with few crumbs)
- Cool in tin for 15 minutes, then transfer to wire rack
- Cool completely before slicing for best texture
This recipe is for informational purposes only and is not medical or dietary advice. Please consult a healthcare professional before making any changes to your diet.
Related Articles
- Is rice high in FODMAP?
- Turkey Sausage and Egg Skillet
- How many poos a day is normal with IBS?
- Ham and Cheese Crustless Quiche
- Gluten-Free Raspberry Muffins