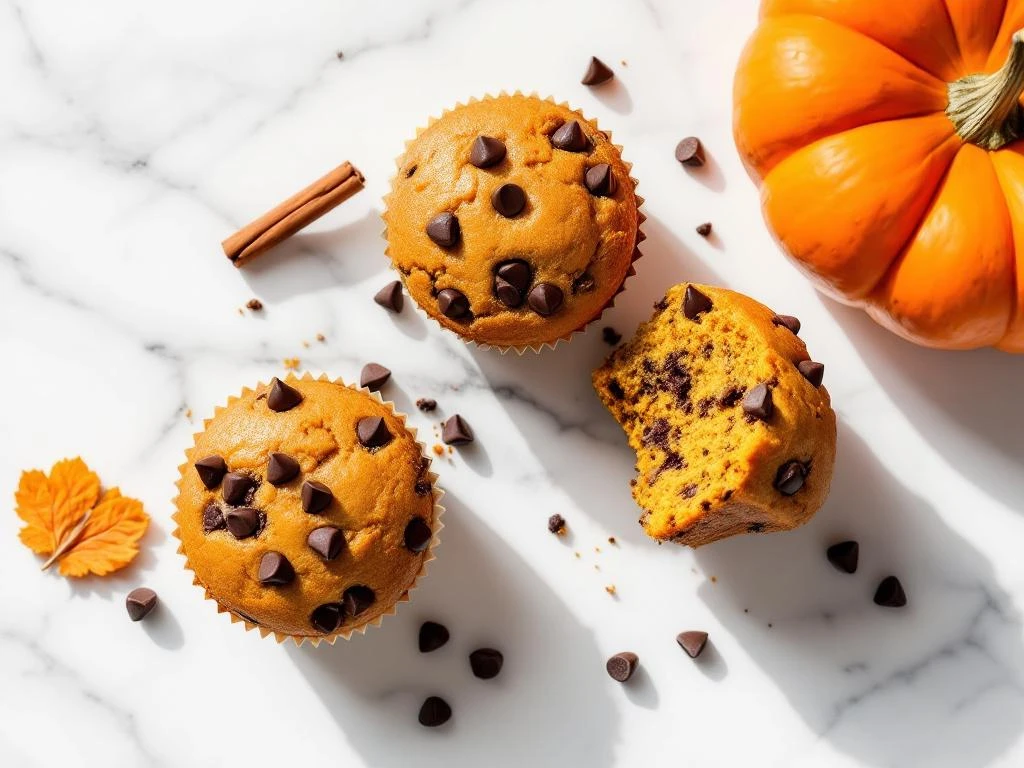
These gluten-free pumpkin chocolate chip muffins make the perfect IBS-friendly treat when you’re following a low FODMAP diet. The combination of warming spices, rich chocolate chips and moist pumpkin creates a satisfying breakfast or snack that won’t trigger digestive symptoms. This recipe takes about 40 minutes from start to finish, including baking time. You’ll need basic baking equipment and a few simple ingredients that are gentle on sensitive stomachs. Whether you’re new to gluten-free baking or experienced with FODMAP-friendly cooking, these muffins deliver consistent results without compromising on taste or texture.
Why these gluten-free pumpkin muffins work for IBS
These muffins are designed specifically for people managing IBS through the low FODMAP diet. The recipe avoids common trigger ingredients like wheat flour, regular milk and high FODMAP sweeteners. Instead, we use a gluten-free flour blend that’s gentle on your digestive system whilst still creating that tender, bakery-style texture you want in a good muffin.
Pumpkin puree forms the base of these muffins and brings natural moisture without adding FODMAPs. It’s rich in soluble fibre that many people with IBS tolerate well. The recipe keeps portions controlled to stay within safe FODMAP limits. Each muffin provides nutritional benefits including vitamin A from the pumpkin and healthy fats from the oil, supporting your overall wellbeing whilst respecting your dietary needs.
The chocolate chips we use are lactose-free dark chocolate, which stays low FODMAP in moderate amounts. Eggs provide structure and protein without any FODMAP concerns. The combination of these gut-friendly ingredients means you can enjoy delicious baked goods without the worry that often comes with trying new recipes when you have food sensitivities.
Gather your ingredients and tools
For these gluten-free pumpkin muffins, you’ll need a gluten-free flour blend that contains xanthan gum. Look for blends made from rice flour, potato starch and tapioca starch. Avoid blends containing chickpea flour or coconut flour in large amounts, as these can be higher in FODMAPs. You’ll need 250g of this flour blend for 12 muffins.
Your wet ingredients include 200g of pure pumpkin puree (not pumpkin pie filling), 2 large eggs, 80ml of a neutral oil like rice bran or light olive oil, and 100g of brown sugar. The sugar amount keeps each muffin within low FODMAP limits. Add 1 teaspoon of vanilla extract for flavour depth. For the chocolate element, measure out 100g of lactose-free dark chocolate chips.
The spice mixture brings warmth to these IBS-friendly muffins. Combine 2 teaspoons of baking powder, 1/2 teaspoon of bicarbonate of soda, 1 teaspoon of ground cinnamon, 1/4 teaspoon of ground ginger, 1/4 teaspoon of ground nutmeg and 1/4 teaspoon of salt. These spices are all low FODMAP and add that classic autumn flavour.
Equipment wise, you’ll need two large mixing bowls, a whisk, a rubber spatula, measuring cups and spoons, a 12-cup muffin tin and paper muffin cases. Have a toothpick ready for testing doneness. Preheat your oven to 180°C (160°C fan) before you start mixing.
Mix the dry and wet ingredients separately
Start with your dry ingredients in the larger bowl. Add the gluten-free flour blend, baking powder, bicarbonate of soda, cinnamon, ginger, nutmeg and salt. Whisk these together for about 30 seconds until everything is evenly distributed. This step is crucial for gluten-free baking because it ensures the leavening agents and spices spread throughout the batter. Without gluten to help distribute ingredients during mixing, you need to do this work upfront.
In your second bowl, combine the pumpkin puree, eggs, oil, brown sugar and vanilla extract. Whisk vigorously for about one minute until the mixture becomes smooth and slightly lighter in colour. The sugar should start to dissolve and the eggs should be fully incorporated. This creates an emulsion that helps your muffins stay moist.
The separate mixing method prevents overmixing once you combine everything. Gluten-free batters can become gummy if you stir them too much after adding liquid to flour. By fully mixing each component first, you’ll only need gentle folding in the next step. This technique is what gives these chocolate chip pumpkin muffins their tender crumb instead of a dense, heavy texture.
Combine and fold in chocolate chips
Pour the wet pumpkin mixture into the bowl with your dry ingredients. Use your rubber spatula to fold them together with broad, gentle strokes. Scrape from the bottom of the bowl and fold over the top. Rotate the bowl slightly after each fold. Stop mixing as soon as you no longer see dry flour streaks. The batter will look thick and slightly lumpy, which is exactly right.
Overmixing is the most common mistake in gluten-free baking. Unlike traditional wheat flour muffins where gluten development is a concern, gluten-free batters become dense and gummy when overworked. The starches in your flour blend absorb liquid quickly. Once they’re hydrated, additional stirring only makes the texture worse. Aim for about 15 to 20 gentle folds total.
Add your lactose-free chocolate chips now. Reserve about 2 tablespoons of chips for topping the muffins later. Fold the remaining chips through the batter with just 5 or 6 more strokes. You want them distributed throughout but not every fold needs a chip. Some variation in each muffin is natural and appealing.
Line your muffin tin with paper cases. Use a large spoon or ice cream scoop to divide the batter evenly among the 12 cups. Fill each about three quarters full. Sprinkle the reserved chocolate chips over the tops. This creates an attractive finish and ensures every muffin has visible chocolate.
Bake and test for perfect doneness
Place your muffin tin in the preheated oven on the middle rack. Set your timer for 20 minutes. These FODMAP-friendly muffins typically need 22 to 25 minutes total, but checking at 20 minutes prevents overbaking. The tops should be golden brown and spring back when you gently press the centre.
At the 20 minute mark, insert a toothpick into the centre of one of the middle muffins. These bake more slowly than edge muffins, so they’re your best test. The toothpick should come out with just a few moist crumbs attached. If you see wet batter, return the tin to the oven and check again in 2 minutes. If the toothpick is completely clean, your muffins are done.
Watch for visual cues as well. The edges should pull away slightly from the paper cases. The tops will have small cracks, which is normal and attractive in muffins. You might see the chocolate chips bubbling slightly. The muffins should smell fragrant with cinnamon and pumpkin.
Remove the tin from the oven and let it sit on a cooling rack for 5 minutes. This brief rest allows the muffins to set without continuing to cook. After 5 minutes, lift each muffin out of the tin and place directly on the cooling rack. Let them cool for at least 15 minutes before eating. The texture improves as they cool and the chocolate chips will be less likely to burn your mouth.
Store and enjoy your low FODMAP muffins
Once completely cool, store your gluten-free breakfast muffins in an airtight container at room temperature. They’ll stay fresh for 3 days this way. Layer them in the container with baking paper between levels if you’re stacking them. This prevents the tops from getting squashed or sticking together.
For longer storage, refrigerate the muffins in a sealed container for up to one week. The cool temperature helps prevent mould growth, especially important with the moisture from pumpkin puree. Bring refrigerated muffins to room temperature before eating, or warm them briefly. Pop one in the microwave for 15 seconds to restore that fresh-baked softness.
These muffins freeze beautifully for up to 3 months. Wrap each muffin individually in cling film, then place all wrapped muffins in a freezer bag. Remove as much air as possible before sealing. This method prevents freezer burn and lets you defrost single portions. Thaw frozen muffins overnight in the fridge or at room temperature for about 2 hours.
To reheat, unwrap a thawed muffin and microwave for 20 to 30 seconds. You can also warm them in a 160°C oven for 5 to 8 minutes. This works especially well if you want to serve several at once. The chocolate chips will soften again and the spices will smell wonderful. These easy pumpkin muffins make excellent meal prep for busy mornings when you need a quick, safe breakfast option.
Serve them plain or with a small amount of lactose-free butter. They pair well with a cup of tea or your morning coffee. Each muffin provides a satisfying portion that fits within low FODMAP guidelines when you stick to one muffin per sitting. If you’re in the elimination phase of the FODMAP diet, these muffins give you a treat that won’t derail your progress.
Gluten-free pumpkin chocolate chip muffins
Cooking Time: 25 minutes | Portions: 12 muffins
- 250g gluten-free flour blend (with xanthan gum)
- 200g pure pumpkin puree
- 100g brown sugar
- 2 large eggs
- 80ml neutral oil (rice bran or light olive oil)
- 100g lactose-free dark chocolate chips
- 2 teaspoons baking powder
- 1/2 teaspoon bicarbonate of soda
- 1 teaspoon ground cinnamon
- 1/4 teaspoon ground ginger
- 1/4 teaspoon ground nutmeg
- 1/4 teaspoon salt
- 1 teaspoon vanilla extract
Method:
- Preheat oven to 180°C (160°C fan) and line a 12-cup muffin tin with paper cases
- Whisk together flour blend, baking powder, bicarbonate of soda, spices and salt in a large bowl
- In a separate bowl, whisk pumpkin puree, eggs, oil, sugar and vanilla until smooth
- Pour wet ingredients into dry ingredients and fold gently until just combined (15 to 20 strokes)
- Fold in most of the chocolate chips, reserving some for topping
- Divide batter among muffin cases, filling three quarters full
- Sprinkle reserved chocolate chips on top
- Bake for 22 to 25 minutes until a toothpick inserted in the centre comes out with moist crumbs
- Cool in tin for 5 minutes, then transfer to a cooling rack
- Store in an airtight container at room temperature for 3 days, refrigerate for 1 week, or freeze for 3 months
This recipe is for informational purposes only and is not medical or dietary advice. Please consult a healthcare professional before making any changes to your diet.
Related Articles
- Quinoa and Raspberry Breakfast Bowl
- Strawberry Almond Smoothie
- Blueberry Walnut Overnight Oats
- Is bacon ok on FODMAP?
- Ham and Cheese Crustless Quiche