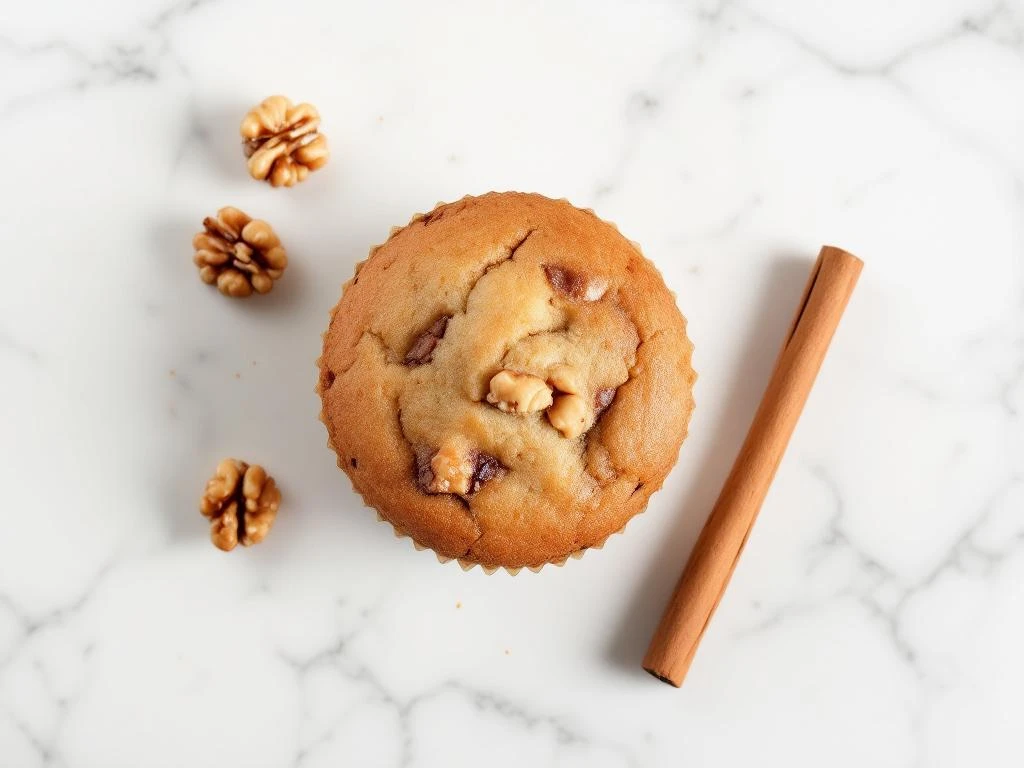
These gluten-free cinnamon walnut muffins give you a tasty breakfast or snack option that fits perfectly into the low FODMAP elimination phase. You’ll create moist, flavourful muffins without triggering IBS symptoms. This recipe works for beginners and takes about 45 minutes from start to finish, including baking time.
You’ll need basic baking tools like mixing bowls, a muffin tin, measuring cups, and a whisk. The ingredients are straightforward and FODMAP-friendly. These easy gluten-free muffins prove that managing IBS doesn’t mean giving up delicious baked goods.
Why gluten-free cinnamon walnut muffins work for IBS
These IBS-friendly muffins fit into your low FODMAP diet because every ingredient stays within safe serving limits. Gluten-free baking removes wheat, which contains fructans that often trigger digestive discomfort. By using certified gluten-free flour blends, you avoid the bloating and pain that many people with IBS experience from regular wheat flour.
Cinnamon adds warmth and flavour without any FODMAP content. It’s completely safe during the elimination phase. Walnuts provide healthy fats and protein in controlled portions (up to 30g per serving remains low FODMAP). This combination creates satisfying texture whilst supporting your digestive health goals.
These gluten-free breakfast muffins work as a grab-and-go option when you need something quick. They’re substantial enough to keep you full without the uncomfortable symptoms that come from high FODMAP breakfast foods like regular bread or pastries. You can eat them plain or with a spread, making them versatile for different meal times.
Gather your low FODMAP muffin ingredients
Your gluten-free flour blend forms the foundation of these muffins. Look for blends containing rice flour, tapioca starch, and potato starch. These starches are naturally low FODMAP and create the right texture. Avoid blends with chickpea flour or soy flour, as these can cause issues during elimination.
For sweetness, use white sugar or maple syrup. Both are low FODMAP in the amounts needed for this recipe. You’ll also need eggs for structure, a neutral oil like rice bran or light olive oil, and a lactose-free milk alternative such as almond milk (limit to 60ml per serving) or lactose-free cow’s milk.
The complete ingredient list includes:
- 250g gluten-free flour blend
- 100g white sugar
- 2 teaspoons baking powder
- 1 teaspoon ground cinnamon
- ½ teaspoon salt
- 60g chopped walnuts
- 2 large eggs
- 80ml neutral oil
- 180ml lactose-free milk
- 1 teaspoon vanilla extract
Quality matters with gluten-free baking. Fresh baking powder ensures proper rise. Old baking powder loses effectiveness and creates dense, heavy muffins. Check the expiry date before starting. Fresh walnuts taste better and provide better texture than stale ones. Store them in the freezer to maintain freshness.
Possible substitutions for your needs
If you can’t eat eggs, try 2 tablespoons of ground flaxseed mixed with 6 tablespoons of water. Let this mixture sit for 5 minutes before adding it to your recipe. The texture will be slightly different but still works well.
For dairy-free muffins, stick with your chosen lactose-free milk alternative. Rice milk or oat milk (in small amounts) also work. Coconut milk from a carton is fine, but avoid the canned version as it’s too thick and high in FODMAPs when used in larger quantities.
Prepare your muffin tin and mix dry ingredients
Set your oven to 180°C (350°F). This temperature ensures even baking without burning the tops. Let the oven preheat fully before putting your muffins in. This takes about 10 minutes.
Line a 12-cup muffin tin with paper cases or grease each cup thoroughly with oil. Paper cases make removal easier and create less mess. If you grease the tin instead, use a pastry brush to coat every surface, including the corners where muffins tend to stick.
Take a large mixing bowl and add your gluten-free flour blend. Gluten-free flours often contain lumps, so sift the flour through a fine-mesh sieve. This step prevents clumps in your finished muffins and creates a lighter texture.
Add the sugar, baking powder, cinnamon, and salt to the sifted flour. Whisk these dry ingredients together for about 30 seconds. Proper mixing distributes the baking powder evenly, which means all your muffins will rise consistently. You should see the cinnamon spread throughout the mixture with no streaks remaining.
Chop your walnuts into small pieces, roughly the size of peas. Larger pieces can sink or create uneven texture. Add the chopped walnuts to your dry mixture and stir them through. This coats the nuts with flour, which helps prevent them from sinking to the bottom during baking.
Combine wet ingredients and fold the batter
Take a medium bowl and crack in your eggs. Whisk them until the yolks and whites blend completely. Add the oil, lactose-free milk, and vanilla extract. Whisk everything together until you see a smooth, uniform liquid. This takes about 20 seconds of steady whisking.
Pour the wet mixture into your bowl of dry ingredients. Here’s where technique matters for gluten-free muffins. Use a spatula or wooden spoon to fold the mixture together with gentle strokes. Scrape from the bottom of the bowl and fold over the top.
Stop mixing as soon as you no longer see dry flour. The batter should look slightly lumpy. Overmixing creates tough, dense gluten-free muffins because it breaks down the starch structure. You want to see some small lumps and streaks. This feels wrong if you’re used to regular baking, but it’s correct for gluten-free baking.
The proper batter consistency looks thick but pourable. It should slowly drop off your spoon rather than running off quickly. If your batter seems too thick, add one tablespoon of lactose-free milk and fold it in gently. Too thin means you measured incorrectly, but the muffins will still work, just with a slightly different texture.
Visual cues for success
Your finished batter should have visible walnut pieces throughout. You might see small pockets of flour, and that’s fine. The mixture should hold its shape slightly when you scoop it but still be soft enough to spread in the muffin cups.
Bake and test for perfect doneness
Use a spoon or ice cream scoop to fill each muffin cup about two-thirds full. This amount allows room for rising without overflowing. Divide the batter evenly between all 12 cups for consistent baking times.
Place your muffin tin in the centre of the preheated oven. Bake for 20 to 25 minutes. The exact time depends on your oven and how full you made each cup. Set a timer for 20 minutes to check progress.
At 20 minutes, look at the tops. They should appear golden brown and slightly domed. The edges might pull away from the paper cases slightly. These are good signs. Now test for doneness by inserting a wooden toothpick or skewer into the centre of one muffin. Push it all the way to the bottom.
Pull the toothpick out and examine it. A fully baked muffin leaves the toothpick clean or with just a few dry crumbs attached. Wet batter on the toothpick means the muffins need more time. Put them back for another 3 to 5 minutes and test again.
The tops should spring back when you press them gently with your finger. This bounce indicates proper structure. If your finger leaves an indent, bake for a few more minutes.
Cooling for best texture
Remove the tin from the oven when the toothpick comes out clean. Let the muffins sit in the tin for 5 minutes. This resting time allows them to firm up slightly, making removal easier. Gluten-free muffins are more delicate than regular ones when hot.
After 5 minutes, lift each muffin out and place it on a wire cooling rack. The rack allows air to circulate underneath, preventing soggy bottoms. Let them cool for at least 15 minutes before eating. They’ll be extremely hot inside even when the outside feels warm.
Store and enjoy your gluten-free muffins
These dairy-free muffins stay fresh at room temperature for 2 days when stored properly. Put them in an airtight container once they’ve cooled completely. Any trapped warmth creates condensation, which makes the muffins soggy.
For longer storage, refrigerate them in an airtight container for up to 5 days. The cold temperature keeps them fresh but firms up the texture slightly. Let refrigerated muffins come to room temperature for 10 minutes before eating, or warm them briefly.
Freezing works brilliantly for these gluten-free breakfast muffins. Wrap each muffin individually in cling film, then place all wrapped muffins in a freezer bag. They’ll keep for up to 3 months. This method prevents freezer burn and makes it easy to grab single servings.
Reheating frozen muffins
Remove a muffin from the freezer and unwrap it. Microwave on medium power for 30 to 45 seconds. Check if it’s warm through by touching the centre. If needed, heat for another 15 seconds. The microwave can make muffins slightly rubbery if you overheat them, so use lower power and shorter bursts.
For oven reheating, wrap the frozen muffin in foil and place it in a 160°C oven for 10 to 15 minutes. This method maintains better texture but takes longer.
Low FODMAP serving suggestions
Enjoy these muffins plain or spread with lactose-free butter. A thin layer of peanut butter (limit to 2 tablespoons) adds protein whilst staying low FODMAP. Avoid honey and agave, as these are high FODMAP sweeteners.
Pair your muffin with a cup of tea or black coffee for a satisfying breakfast. Add a piece of low FODMAP fruit like a small banana or some strawberries to round out the meal. These cinnamon walnut muffins also work well as an afternoon snack when you need something substantial.
We’ve found these muffins travel well for packed lunches or work snacks. They don’t crumble easily and taste good at room temperature. Keep one in your bag for moments when you need a safe, convenient option that won’t trigger symptoms.
Gluten-free cinnamon walnut muffins
Cooking Time: 45 minutes | Portions: 12 muffins
Dry Ingredients:
- 250g gluten-free flour blend
- 100g white sugar
- 2 teaspoons baking powder
- 1 teaspoon ground cinnamon
- ½ teaspoon salt
- 60g chopped walnuts
Wet Ingredients:
- 2 large eggs
- 80ml neutral oil
- 180ml lactose-free milk
- 1 teaspoon vanilla extract
Method:
- Preheat oven to 180°C and line a 12-cup muffin tin with paper cases
- Sift gluten-free flour into a large bowl
- Add sugar, baking powder, cinnamon, and salt, then whisk together
- Stir in chopped walnuts
- In a separate bowl, whisk eggs, oil, lactose-free milk, and vanilla until smooth
- Pour wet ingredients into dry ingredients and fold gently until just combined (batter should be slightly lumpy)
- Fill muffin cups two-thirds full
- Bake for 20 to 25 minutes until golden and a toothpick comes out clean
- Cool in tin for 5 minutes, then transfer to a wire rack
- Store in an airtight container for up to 2 days at room temperature or freeze for up to 3 months
This recipe is for informational purposes only and is not medical or dietary advice. Please consult a healthcare professional before making any changes to your diet.