Making a satisfying breakfast when you have IBS can feel impossible. You want something filling that won’t trigger symptoms, but most protein-rich options are off-limits. These blueberry protein pancakes solve that problem. They combine gut-friendly ingredients with enough protein to keep you full all morning. You’ll make fluffy, delicious gluten free protein pancakes that work with your digestive system instead of against it. This recipe is beginner-friendly and takes about 20 minutes from start to finish. You’ll need a mixing bowl, whisk, non-stick pan, and basic measuring tools. By the end, you’ll have a reliable IBS friendly pancakes recipe you can make any day of the week.
Why blueberry protein pancakes work for IBS
These pancakes address the main breakfast challenge for people with IBS. They provide sustained energy without causing digestive distress. The combination of low FODMAP ingredients with adequate protein makes them different from typical pancake recipes that rely on wheat flour and regular milk.
Protein plays a crucial role in managing IBS symptoms. It slows down digestion in a good way, helping stabilize blood sugar levels and preventing the energy crashes that can worsen gut symptoms. When you eat protein at breakfast, you feel fuller longer and avoid the need to snack on potentially triggering foods mid-morning. These high protein breakfast low FODMAP pancakes deliver around 15-20 grams of protein per serving, depending on your protein powder choice.
Blueberries in controlled portions are safe for the low FODMAP diet. A serving of 20 blueberries (about 28 grams) stays within safe limits. This amount adds natural sweetness, antioxidants, and fibre without triggering symptoms. Fresh or frozen blueberries both work well, making this recipe practical year-round.
The recipe avoids common breakfast triggers. No wheat means no fructans. No regular milk means no lactose. No high-FODMAP fruits means no excess fructose. You get a complete meal that supports your digestive health while actually tasting good.
Gather your low FODMAP pancake ingredients
Start with a gluten-free flour blend designed for baking. Look for blends containing rice flour, potato starch, and tapioca starch. Avoid blends with chickpea flour or soy flour, as these can be high FODMAP. You’ll need about 120 grams (1 cup) for a batch that makes 6-8 pancakes.
Choose your protein powder carefully. Lactose-free whey isolate works if you tolerate dairy proteins. The isolate form has minimal lactose compared to concentrate. Plant-based options include rice protein or pea protein in small amounts (pea protein can be high FODMAP in large servings, so stick to one scoop). You’ll need about 30 grams (one scoop) of protein powder.
For the wet ingredients, use 2 large eggs and 180ml (3/4 cup) of lactose-free milk. Almond milk in small amounts (up to 250ml) also works as a low FODMAP alternative. Avoid soy milk and oat milk, which contain higher FODMAP levels.
The leavening agents include 1 teaspoon of baking powder and 1/4 teaspoon of bicarbonate of soda. These help create fluffy texture without any digestive issues. Add a pinch of salt and optional vanilla extract (1/2 teaspoon) for flavour.
Measure out 60 grams (about 1/3 cup) of fresh or frozen blueberries. If using frozen, don’t thaw them before adding to the batter. This prevents excess moisture and colour bleeding.
Mix the batter for perfect texture
Combine all dry ingredients in a large bowl. Whisk together the gluten-free flour, protein powder, baking powder, bicarbonate of soda, and salt. Mix thoroughly to distribute the leavening agents evenly. This prevents pockets of baking powder that can create an unpleasant taste.
In a separate bowl, whisk the eggs until slightly frothy. Add the lactose-free milk and vanilla extract if using. Beat together until well combined. The separate mixing prevents overmixing once you combine wet and dry ingredients.
Pour the wet ingredients into the dry ingredients. Use a spatula or wooden spoon to fold them together gently. Stop mixing as soon as you no longer see dry flour. The batter should look slightly lumpy. Overmixing develops the starches in gluten-free flour, creating gummy pancakes instead of fluffy ones.
Check the consistency. The batter should pour slowly off your spoon, similar to thick double cream. Too thick means your pancakes will be dense. Add a tablespoon of lactose-free milk if needed. Too thin means flat pancakes. Add a tablespoon of flour blend if the batter runs like water.
Fold in the blueberries last. Use gentle motions to avoid crushing them. Crushed berries release juice that can make the batter purple and affect texture. If using frozen berries, work quickly so they don’t start thawing in the batter.
Let the batter rest for 5 minutes. This allows the flour to hydrate fully and the leavening agents to start working. You’ll see small bubbles forming on the surface. This rest period improves the final texture significantly.
Cook pancakes to fluffy perfection
Heat a non-stick pan or griddle over medium heat. This temperature is crucial. Too hot and the outside burns before the inside cooks. Too cool and the pancakes spread too thin and turn tough. Test the temperature by sprinkling a few water drops on the surface. They should sizzle and evaporate within a few seconds.
Add a small amount of lactose-free butter or neutral oil to the pan. Use about 1/2 teaspoon per batch. Spread it around with a paper towel to create a thin, even layer. Too much fat makes the pancakes greasy rather than golden.
Pour about 60ml (1/4 cup) of batter per pancake onto the hot surface. Don’t spread the batter. Let it settle into a natural circle about 10cm wide. Leave space between pancakes so you can flip them easily.
Watch for bubbles to form on the surface. This takes about 2-3 minutes. You’ll see small bubbles appear across the top, and the edges will look slightly dry and set. When bubbles in the centre start to pop and stay open, it’s time to flip.
Slide a thin spatula under the pancake and flip quickly in one motion. The cooked side should be golden brown. If it’s pale, your heat is too low. If it’s dark brown or burnt, reduce the temperature slightly for the next batch.
Cook the second side for about 1-2 minutes. This side cooks faster than the first. The pancake should feel springy when you press it gently with the spatula. If it feels firm, it’s done. If it feels mushy, give it another 30 seconds.
Keep finished pancakes warm while you cook the rest. Place them on a plate in a low oven (about 90°C/200°F) or cover loosely with foil. Don’t stack them directly on top of each other or they’ll become soggy. Place parchment paper between layers if needed.
What are the best low FODMAP toppings?
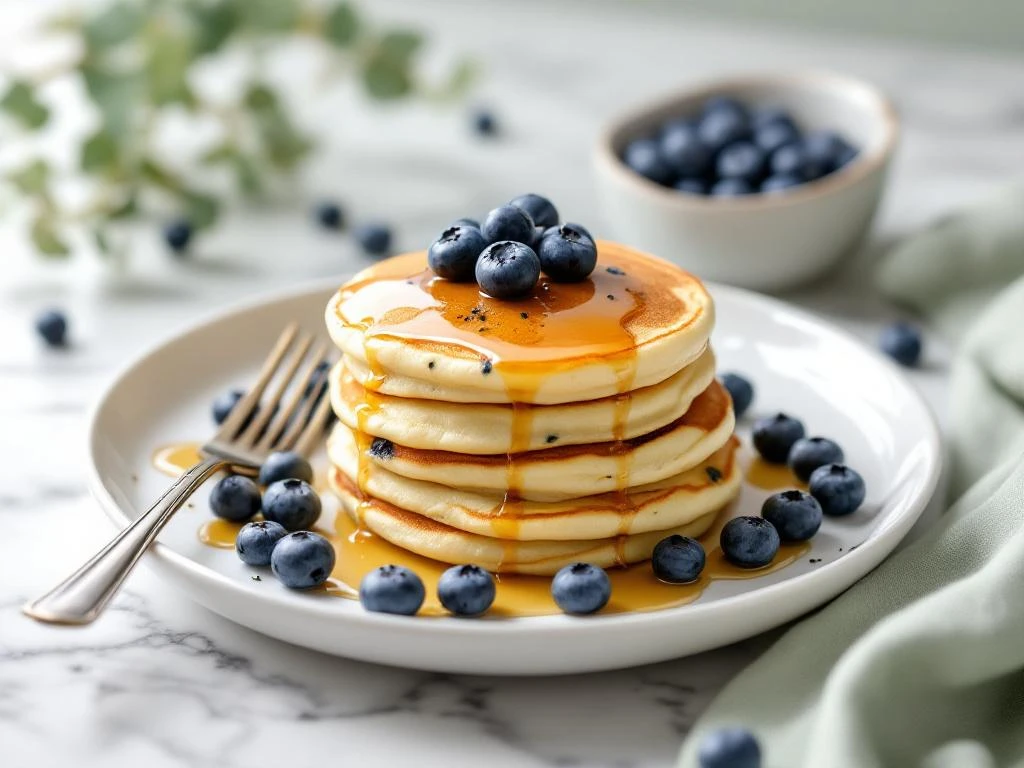
Pure maple syrup is the safest sweet topping. Use about 1-2 tablespoons per serving. This amount stays within low FODMAP limits while adding natural sweetness. Avoid honey and agave syrup, which are high FODMAP even in small amounts.
Lactose-free yoghurt adds creaminess and extra protein. A dollop of about 2-3 tablespoons works well. Choose plain varieties without added fruit or sweeteners. Greek-style lactose-free yoghurt provides even more protein and a tangy contrast to the sweet pancakes.
Add more fresh blueberries if you have room in your FODMAP budget. Another 20 berries (28 grams) keeps you within safe limits. Scatter them on top rather than mixing them in so you can control portions easily. Strawberries also work, with a safe serving of about 5 medium berries (65 grams).
Nut butters add healthy fats and rich flavour. Peanut butter and almond butter are low FODMAP in servings up to 2 tablespoons. Avoid cashew butter, which becomes high FODMAP quickly. Spread the nut butter thinly or drizzle it if it’s runny.
A sprinkle of cinnamon or a few dark chocolate chips (check for low FODMAP certification) can make these gut friendly pancakes feel special. Keep portions small to avoid FODMAP stacking. One small square of dark chocolate (about 5 grams) or 1/4 teaspoon of cinnamon adds flavour without triggering symptoms.
Watch your total FODMAP load. Even low FODMAP foods can cause problems when you eat too many in one meal. Stick to one or two toppings rather than piling everything on at once.
Store and reheat for meal prep success
Cool the pancakes completely before storing. Place them on a wire rack so air circulates around them. Warm pancakes create condensation in containers, leading to soggy texture and faster spoilage. This takes about 15-20 minutes.
For refrigerator storage, place cooled pancakes in an airtight container. Put parchment paper or cling film between each pancake to prevent sticking. They’ll keep for 3-4 days in the fridge. This makes them perfect for easy low FODMAP breakfast meal prep.
Freeze pancakes for longer storage. Arrange them in a single layer on a baking tray and freeze for 1-2 hours until solid. This prevents them from freezing together. Once frozen, transfer to a freezer bag or container. They’ll keep for up to 3 months. Label the container with the date so you know when to use them.
Reheat refrigerated pancakes in the microwave for quick results. Place one or two on a microwave-safe plate and heat for 30-40 seconds. Add 10-15 seconds if they’re not warm enough. Cover with a damp paper towel to prevent drying out.
Use a toaster for crispy edges. Place the pancake directly in the toaster slot like bread. Toast on medium setting until heated through and slightly crispy on the outside. This method works brilliantly for frozen pancakes too.
Reheat in a pan for the best texture. Warm a non-stick pan over medium-low heat with a tiny bit of lactose-free butter. Place the pancake in the pan and heat for about 1 minute per side. This restores the fresh-cooked texture better than other methods.
Make a full batch on Sunday evening. Store them properly and you’ll have protein-rich breakfasts ready all week. Grab two pancakes, reheat, add your favourite low FODMAP topping, and you’re done in under 2 minutes.
These lactose free protein pancakes prove that managing IBS doesn’t mean boring breakfasts. You’ve learned how to combine gut-friendly ingredients, mix them properly, cook them to perfection, and store them for busy mornings. The recipe gives you control over your symptoms while delivering the protein and satisfaction your body needs. Make a batch this weekend and see how much easier your mornings become when breakfast works with your digestive system.
Blueberry protein pancakes
Cooking time: 20 minutes | Portions: 6-8 pancakes
Dry ingredients:
- 120g gluten-free flour blend (rice, potato, tapioca)
- 30g lactose-free whey isolate or rice protein powder
- 1 teaspoon baking powder
- 1/4 teaspoon bicarbonate of soda
- Pinch of salt
Wet ingredients:
- 2 large eggs
- 180ml lactose-free milk or almond milk
- 1/2 teaspoon vanilla extract (optional)
Mix-ins:
- 60g fresh or frozen blueberries (about 1/3 cup)
Steps:
- Whisk dry ingredients together in a large bowl
- Beat eggs, milk, and vanilla in a separate bowl
- Pour wet into dry and fold gently until just combined
- Check consistency (should be thick but pourable)
- Fold in blueberries gently
- Let batter rest for 5 minutes
- Heat non-stick pan over medium heat with small amount of lactose-free butter
- Pour 60ml batter per pancake
- Cook 2-3 minutes until bubbles form and pop
- Flip and cook 1-2 minutes until golden
- Keep warm while cooking remaining batter
- Serve with maple syrup, lactose-free yoghurt, or other low FODMAP toppings
Storage: Refrigerate in airtight container with parchment between pancakes for 3-4 days, or freeze for up to 3 months. Reheat in microwave (30-40 seconds), toaster, or pan.
This recipe is for informational purposes only and is not medical or dietary advice. Please consult a healthcare professional before making any changes to your diet.