If you love autumn flavours but struggle with digestive issues, this gluten-free pumpkin spice bread offers everything you want in a seasonal treat. It delivers warm spices, moist texture, and that classic pumpkin taste without triggering IBS symptoms. This recipe uses carefully selected low FODMAP ingredients that support gut health whilst maintaining the comforting qualities of traditional pumpkin bread.
This guide suits beginner bakers with basic kitchen skills. You’ll need about 15 minutes for preparation and 50 minutes for baking. The recipe produces one loaf that serves 10 portions, perfect for meal prep or sharing with family.
You’ll need a loaf tin, mixing bowls, measuring cups and spoons, and an electric mixer or whisk. All ingredients are available at most supermarkets, with gluten-free flour being the only speciality item you might need to source from the baking aisle or health food section.
Why this gluten-free pumpkin bread works for IBS
Traditional pumpkin bread often contains wheat flour, large amounts of onion or garlic powder, and high FODMAP sweeteners that trigger digestive discomfort. This FODMAP friendly pumpkin bread eliminates these triggers whilst preserving everything you love about autumn baking.
The recipe uses pure pumpkin puree rather than pumpkin pie filling, which often contains hidden high FODMAP ingredients. Pumpkin itself is low FODMAP in servings up to 75g, making it perfect for this bread when portioned correctly. The natural moisture from pumpkin helps create a tender crumb that many gluten-free breads struggle to achieve.
We’ve selected spices that are safe for sensitive stomachs. Cinnamon, ginger, and nutmeg add warmth without causing issues, unlike garlic or onion powder found in some spice blends. The gluten-free flour blend provides structure without wheat, whilst a small amount of lactose-free butter or oil keeps the texture moist without dairy-related symptoms.
This IBS friendly pumpkin bread proves you don’t need to sacrifice flavour for digestive comfort. Each slice offers the seasonal taste you’re craving whilst supporting your gut health goals.
Gather your gluten-free pumpkin bread ingredients
Success with gluten-free baking starts with the right ingredients. Here’s everything you need for this low FODMAP pumpkin bread recipe:
Dry ingredients:
- 300g gluten-free flour blend (look for blends containing rice flour, potato starch, and tapioca starch)
- 1½ teaspoons baking powder
- ½ teaspoon bicarbonate of soda
- 2 teaspoons ground cinnamon
- ½ teaspoon ground ginger
- ¼ teaspoon ground nutmeg
- ½ teaspoon salt
- 1 teaspoon xanthan gum (if your flour blend doesn’t already contain it)
Wet ingredients:
- 200g pure pumpkin puree (not pumpkin pie filling)
- 150g brown sugar or coconut sugar
- 100ml lactose-free milk or almond milk
- 80ml vegetable oil or melted lactose-free butter
- 2 large eggs
- 1 teaspoon vanilla extract
When choosing your gluten-free flour blend, avoid mixes that contain chickpea flour or soy flour in large amounts, as these can be harder to digest. A simple rice flour based blend works best for this easy gluten-free bread. Check that your baking powder doesn’t contain wheat starch, as some brands do.
For the pumpkin puree, read labels carefully. You want 100% pumpkin with no added spices, sweeteners, or thickeners. If you can’t find tinned pumpkin, you can roast and puree butternut squash as a substitute, keeping portions within low FODMAP limits.
Substitution options include maple syrup instead of sugar (use 120ml and reduce milk slightly), or coconut oil instead of vegetable oil for a subtle flavour boost. For egg-free needs, try two flax eggs (2 tablespoons ground flaxseed mixed with 6 tablespoons water, left to thicken for 5 minutes).
Prepare your baking setup and mix the batter
Preheat your oven to 175°C (350°F). This temperature ensures even baking without drying out the bread. Whilst the oven heats, prepare your loaf tin by greasing it thoroughly with oil or lactose-free butter, then dust with a light coating of gluten-free flour. This prevents sticking, which is particularly important with gluten-free batters.
Grab two large mixing bowls. In the first bowl, whisk together all your dry ingredients. Make sure to break up any lumps in the flour and distribute the spices evenly. This step matters because gluten-free flours can clump, and you want consistent spice flavour throughout your homemade pumpkin bread.
In your second bowl, combine the pumpkin puree, sugar, milk, oil, eggs, and vanilla. Whisk these wet ingredients until smooth and the sugar begins to dissolve. The mixture should look uniform with no streaks of egg visible.
Pour the wet ingredients into the dry ingredients. Here’s where gluten-free baking differs from traditional methods. Mix gently with a spatula or wooden spoon until just combined. The batter will be thicker than regular cake batter but should still be pourable. You’ll see a slightly grainy texture from the gluten-free flour, which is normal.
Avoid overmixing at this stage. Unlike wheat-based batters where you worry about developing gluten, the concern here is incorporating too much air or breaking down the structure provided by xanthan gum. About 20 gentle folds should do it. Some small lumps are fine and will disappear during baking.
Pour the batter into your prepared loaf tin. Use your spatula to spread it evenly, paying attention to the corners. Tap the tin gently on your counter twice to release any large air bubbles that could create holes in your finished bread.
Bake and test for perfect doneness
Place your loaf tin in the centre of the preheated oven. Set your timer for 50 minutes, but don’t walk away just yet. Understanding the visual cues helps you achieve perfect results with this gluten-free pumpkin bread recipe.
At the 25-minute mark, check your bread. The top should be starting to set and turn golden. If it’s browning too quickly, loosely cover it with aluminium foil. This prevents a dark crust whilst allowing the centre to bake through, which is particularly important for dense gluten-free batters.
At 45 minutes, start testing for doneness. Insert a wooden skewer or toothpick into the centre of the loaf. It should come out clean or with just a few moist crumbs attached. If you see wet batter, continue baking and check every 5 minutes.
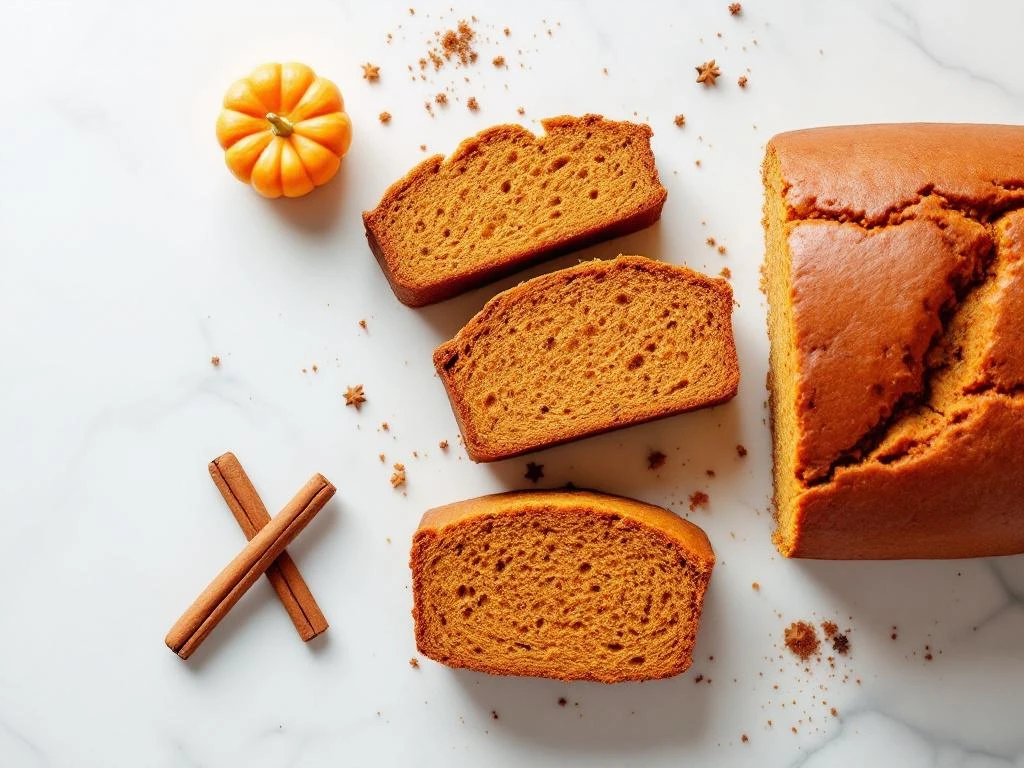
Other signs of doneness include a golden-brown top, edges that have pulled slightly away from the tin, and a firm surface that springs back lightly when touched. The internal temperature should reach 95°C (200°F) if you have a kitchen thermometer.
When your bread passes the toothpick test, remove it from the oven. Let it cool in the tin for 15 minutes. This resting period is crucial for gluten-free baking. The bread continues to set during this time, making it less likely to crumble when you remove it from the tin.
After 15 minutes, run a knife around the edges and carefully turn the loaf out onto a wire cooling rack. Let it cool completely before slicing, about 1 hour. Cutting warm gluten-free bread often results in a gummy texture and uneven slices.
Store and serve your pumpkin spice bread
Once your low FODMAP baking creation has cooled completely, it’s ready to slice and enjoy. Use a sharp serrated knife and a gentle sawing motion to cut clean slices without compressing the bread. Aim for slices about 1.5cm thick, which keeps portions within low FODMAP serving sizes.
This pumpkin spice bread recipe tastes wonderful on its own, but you can enhance it with low FODMAP friendly toppings. Try a thin spread of lactose-free butter, a drizzle of maple syrup, or a smear of almond butter. For breakfast, pair a slice with scrambled eggs and a handful of strawberries. As an afternoon snack, enjoy it with a cup of peppermint tea.
Store your bread in an airtight container at room temperature for up to 3 days. The moisture from the pumpkin helps it stay fresh longer than many gluten-free breads. If your kitchen is particularly warm, refrigerate it to prevent mould, though this may firm up the texture slightly.
For longer storage, this bread freezes beautifully. Wrap individual slices in cling film, then place them in a freezer bag. They’ll keep for up to 3 months. When you want a slice, simply remove it from the freezer and let it thaw at room temperature for about 30 minutes, or pop it in the toaster for a warm, crispy treat.
Meal prep tip: Slice the entire loaf before freezing. This way, you can grab exactly what you need without defrosting the whole thing. Label your container with the date so you can track freshness.
Troubleshoot common gluten-free baking issues
Even experienced bakers encounter challenges with gluten-free recipes. Here’s how to solve the most common problems with this IBS friendly pumpkin bread.
Dense or heavy texture: This usually means too much liquid or not enough leavening. Check that your baking powder is fresh by dropping a bit in warm water. It should fizz immediately. If your bread still turns out dense, reduce the milk by 2 tablespoons next time or add an extra ½ teaspoon of baking powder.
Gluten-free flour blends vary in absorption. Some need more liquid, others less. If you’re trying a new brand and the batter seems too thick, add milk one tablespoon at a time until it reaches a thick but pourable consistency.
Crumbly consistency: This happens when the bread lacks binding. Make sure you’re including xanthan gum if your flour blend doesn’t have it. The eggs also provide structure, so ensure they’re at room temperature before mixing, as cold eggs don’t emulsify as well. Adding an extra egg white can improve binding without making the bread heavy.
Sunken centre: Usually caused by underbaking or too much leavening. The bread rises beautifully in the oven, then collapses as it cools. Ensure your oven temperature is accurate using an oven thermometer. Many ovens run hot or cold. If the problem persists, reduce baking powder by ¼ teaspoon and bake for an extra 5 minutes.
Dry bread: Overbaking is the typical culprit. Start checking at 45 minutes rather than waiting the full 50. The pumpkin should keep this bread moist, but if you live in a dry climate, add an extra tablespoon of oil. Store the bread in an airtight container immediately after cooling to lock in moisture.
Gummy texture: This occurs when you slice the bread before it’s completely cool. Gluten-free baked goods need that full cooling time to set their structure. If you’re in a hurry, at least wait until the bread is barely warm to the touch.
Remember that gluten-free flour behaves differently from wheat flour. It doesn’t develop gluten strands that provide structure, so we rely on starches, gums, and proper technique instead. Each attempt teaches you how your specific ingredients and oven work together, so don’t get discouraged if your first loaf isn’t perfect.
This gluten-free pumpkin spice bread brings autumn comfort to your kitchen without compromising your digestive health. The combination of carefully chosen low FODMAP ingredients creates a moist, flavourful loaf that rivals any traditional recipe. You’ve now got the knowledge to bake confidently, troubleshoot issues, and enjoy seasonal baking that supports your wellbeing.
Try experimenting with the spice ratios once you’ve mastered the basic recipe. Some people prefer more ginger for extra warmth, whilst others love a heavier cinnamon presence. The beauty of home baking is making it exactly how you like it.
Keep this recipe in your regular rotation throughout autumn and winter. It’s perfect for weekend meal prep, providing quick breakfasts or snacks that you can feel good about eating.
Gluten-free pumpkin spice bread
Prep time: 15 minutes | Baking time: 50 minutes | Portions: 10 slices
Dry ingredients:
- 300g gluten-free flour blend
- 1½ teaspoons baking powder
- ½ teaspoon bicarbonate of soda
- 2 teaspoons ground cinnamon
- ½ teaspoon ground ginger
- ¼ teaspoon ground nutmeg
- ½ teaspoon salt
- 1 teaspoon xanthan gum (if not in flour blend)
Wet ingredients:
- 200g pure pumpkin puree
- 150g brown sugar
- 100ml lactose-free milk
- 80ml vegetable oil
- 2 large eggs
- 1 teaspoon vanilla extract
Instructions:
- Preheat oven to 175°C (350°F) and grease a loaf tin
- Whisk all dry ingredients together in a large bowl
- Mix all wet ingredients in a separate bowl until smooth
- Pour wet into dry and fold gently until just combined
- Pour batter into prepared tin and tap to remove air bubbles
- Bake for 50 minutes or until toothpick comes out clean
- Cool in tin for 15 minutes, then transfer to wire rack
- Let cool completely before slicing
This recipe is for informational purposes only and is not medical or dietary advice. Please consult a healthcare professional before making any changes to your diet.