Managing IBS symptoms while enjoying a satisfying breakfast can feel impossible when you’re rushing through your morning. These quinoa breakfast cookies solve that problem by giving you a nutritious, portable meal that’s completely low FODMAP and gentle on your digestive system. You can make a batch ahead and have breakfast sorted for the entire week.
This recipe works for beginners who can follow basic baking instructions. You’ll need about 45 minutes total, including 15 minutes of active preparation and 30 minutes of baking time. The cookies stay fresh for up to five days when stored properly, making them perfect for meal prep.
You’ll need a medium saucepan for cooking quinoa, mixing bowls, measuring cups and spoons, a baking tray, and parchment paper. All ingredients are elimination phase friendly, so you can enjoy these cookies even during the strictest part of your low FODMAP journey.
Why quinoa breakfast cookies work for IBS
Quinoa fits perfectly into the low FODMAP diet because it contains no problematic carbohydrates that trigger IBS symptoms. Unlike wheat or oats, quinoa is naturally gluten free and doesn’t ferment in your gut. This makes it an excellent base for breakfast cookies when you need something that won’t cause bloating or discomfort.
The nutritional profile of quinoa supports digestive health in several ways. It provides complete protein with all nine essential amino acids, helping you feel satisfied until lunch. The fibre content is moderate and well tolerated, supporting regular bowel movements without overwhelming your sensitive system. Quinoa also contains iron, magnesium, and B vitamins that many people with IBS struggle to get enough of.
These cookies work as an ideal breakfast option because they’re portable, filling, and won’t upset your stomach first thing in the morning. You can eat them at home or take them with you, avoiding the temptation of unsafe breakfast options when you’re out. The combination of protein, healthy fats, and complex carbohydrates keeps your energy stable without causing blood sugar spikes that can worsen IBS symptoms.
Gather your low FODMAP cookie ingredients
For the quinoa base, you’ll need 100g of uncooked quinoa and 250ml of water. Make sure your quinoa is plain and unseasoned. Check the package to confirm it hasn’t been processed in a facility with high FODMAP ingredients.
The binding ingredients include two large eggs, 80g of smooth peanut butter (check it contains only peanuts and salt), and 60ml of maple syrup. If you can’t tolerate peanut butter, use almond butter instead. Both are low FODMAP in these portions.
You’ll also need 40g of ground flaxseed, one teaspoon of vanilla extract, half a teaspoon of baking powder, and a quarter teaspoon of salt. For mix-ins, use 50g of dark chocolate chips (check they’re dairy free) or 40g of pumpkin seeds. Both options are safe for the elimination phase.
Keep these FODMAP-friendly alternatives in mind. Replace maple syrup with rice malt syrup if you prefer. Swap peanut butter for sunflower seed butter if you have nut allergies. Use chia seeds instead of flaxseed if that’s what you have available. All these substitutions maintain the low FODMAP status of your cookies.
Equipment checklist
- Medium saucepan with lid for cooking quinoa
- Fine mesh strainer for rinsing quinoa
- Large mixing bowl for combining wet ingredients
- Wooden spoon or silicone spatula for mixing
- Baking tray and parchment paper
- Tablespoon for portioning cookie dough
Prepare and cook the quinoa base
Rinse your quinoa thoroughly under cold running water for at least 30 seconds. This removes the natural coating called saponin that can taste bitter. Use a fine mesh strainer so the tiny grains don’t slip through.
Place the rinsed quinoa and water in your saucepan. Bring to a boil over high heat, then reduce to low and cover with a lid. Simmer for 15 minutes without lifting the lid. The quinoa is ready when all the water is absorbed and you can see tiny spiral tails on each grain.
Remove the pan from heat and let it sit covered for five minutes. This steaming step makes the quinoa fluffy instead of mushy. Fluff with a fork, then spread the quinoa on a plate to cool completely. This takes about 20 minutes at room temperature.
The cooling step is crucial for cookie texture. Warm quinoa will make your cookie dough too wet and the cookies won’t hold their shape during baking. If you’re short on time, spread the quinoa thinly on a baking tray and place it in the fridge for 10 minutes.
Success check: Your cooked quinoa should be tender but still have a slight bite. Each grain should be separate, not clumped together. If your quinoa is mushy, you’ve added too much water or cooked it too long. It will still work in the cookies but might make them slightly softer.
Mix and shape your breakfast cookies
Preheat your oven to 180°C (160°C fan) while you prepare the dough. Line your baking tray with parchment paper to prevent sticking.
Combine the eggs, peanut butter, maple syrup, and vanilla extract in your large mixing bowl. Stir vigorously until the mixture is smooth and well combined. This takes about one minute of mixing. The peanut butter should be fully incorporated with no streaks remaining.
Add the cooled quinoa, ground flaxseed, baking powder, and salt to the wet ingredients. Stir gently until everything is evenly distributed. The dough will be thick but scoopable, similar to thick porridge. Fold in your chocolate chips or pumpkin seeds last.
The right dough consistency is important for proper cookie shape. If your mixture is too dry and crumbly, add one tablespoon of water and mix again. If it’s too wet and runny, add one tablespoon of ground flaxseed and let it sit for five minutes to absorb moisture.
Portioning technique
Use a tablespoon to scoop portions of dough onto your prepared baking tray. Each cookie should use about two tablespoons of mixture. Space them about 5cm apart as they spread slightly during baking.
Gently flatten each portion with the back of your spoon to about 1cm thickness. The cookies won’t spread much on their own, so shape them how you want them to look when finished. Aim for rounds about 6cm in diameter.
This recipe makes approximately 12 cookies depending on your portion sizes. Adjust the number based on whether you prefer larger breakfast cookies or smaller snack-sized portions.
Bake and store quinoa cookies properly
Bake the cookies for 18 to 20 minutes at 180°C (160°C fan). They’re done when the edges turn golden brown and the centres look set rather than wet. The tops should feel firm when you gently touch them.
Watch for these visual cues of doneness. The edges will darken first while the centres remain lighter. Small cracks may appear on the surface, which is normal. The cookies will look slightly puffed but will flatten as they cool.
Leave the cookies on the baking tray for five minutes after removing them from the oven. This cooling period lets them firm up so they don’t break when you move them. Transfer to a wire cooling rack using a spatula and let them cool completely, about 15 minutes.
Warning: Don’t try to move the cookies immediately after baking. They’re very soft when hot and will fall apart. The cooling time is essential for achieving the right texture.
Storage for meal prep success
Store completely cooled cookies in an airtight container at room temperature for up to three days. Layer them with parchment paper between each row to prevent sticking. They’ll stay fresh and maintain their texture when stored properly.
For longer storage, keep them in the fridge for up to five days. The cold temperature makes them firmer, which some people prefer. Let them sit at room temperature for 10 minutes before eating if you want a softer texture.
These cookies freeze beautifully for up to three months. Wrap individual cookies in cling film, then store them together in a freezer bag. Thaw overnight in the fridge or for 30 minutes at room temperature. You can also warm frozen cookies in the microwave for 20 seconds.
Customize your cookies for variety
Add one teaspoon of cinnamon and a quarter teaspoon of ginger for a warming spiced version. Both spices are low FODMAP and complement the natural nuttiness of quinoa. This variation tastes particularly good in autumn and winter.
Create a citrus version by adding the zest of one orange or lemon to the wet ingredients. Citrus zest is low FODMAP and adds brightness without extra sweetness. This works especially well if you’re using the pumpkin seed option instead of chocolate chips.
For a tropical twist, add 30g of unsweetened desiccated coconut and replace the chocolate chips with 40g of chopped macadamia nuts. Both ingredients are low FODMAP in these amounts and create a completely different flavour profile.
Adapting for reintroduction phase
Once you’ve successfully reintroduced certain foods, you can expand your cookie options. Try adding 50g of dried cranberries if you’ve reintroduced fructose successfully. Use regular oats mixed with the quinoa if you’ve passed the fructan challenge.
Swap the peanut butter for cashew butter after you’ve tested cashews during reintroduction. Add a tablespoon of honey instead of maple syrup if you’ve cleared that hurdle. Always test new ingredients separately before combining them in recipes.
Keep a food diary when you try new variations. Note which additions you’ve tested and how your body responded. This helps you build a collection of safe recipes that work specifically for your individual tolerances.
These healthy breakfast cookies give you control over your morning routine while managing IBS symptoms. The make ahead breakfast approach means you always have something safe to eat, even on your busiest days. The recipe is flexible enough to keep breakfast interesting while staying within your FODMAP friendly snacks guidelines.
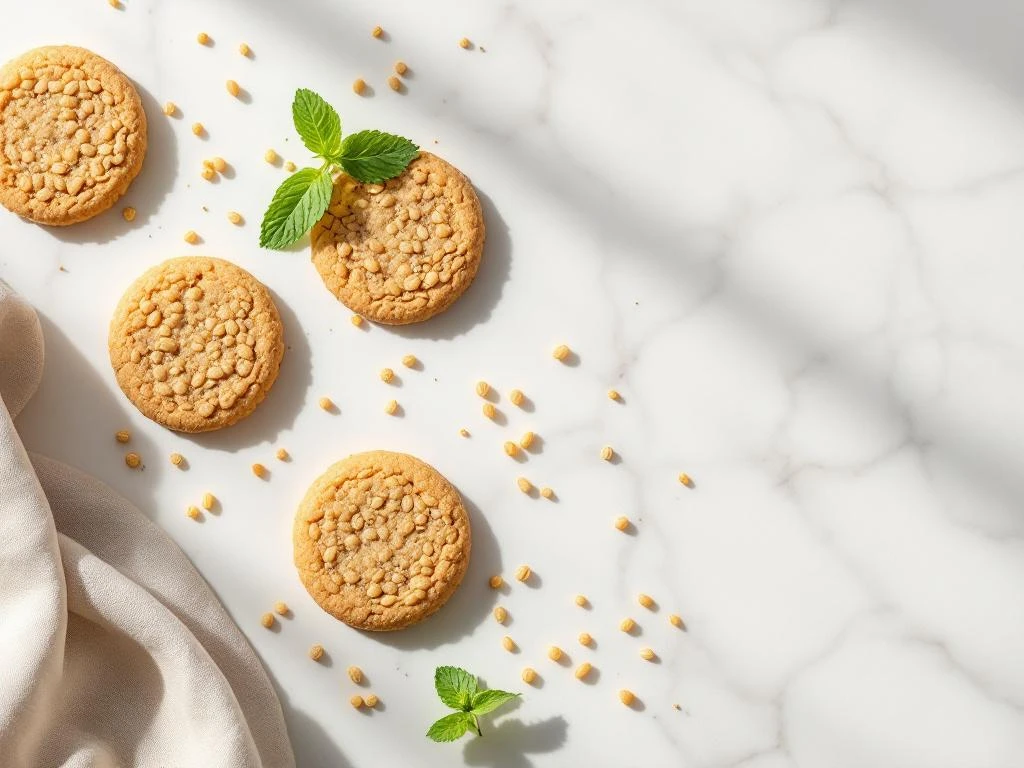
Quinoa breakfast cookies
Cooking Time: 45 minutes | Portions: 12 cookies
Ingredients
- 100g uncooked quinoa
- 250ml water
- 2 large eggs
- 80g smooth peanut butter (peanuts and salt only)
- 60ml maple syrup
- 40g ground flaxseed
- 1 teaspoon vanilla extract
- ½ teaspoon baking powder
- ¼ teaspoon salt
- 50g dairy free dark chocolate chips or 40g pumpkin seeds
Method
- Rinse quinoa thoroughly in a fine mesh strainer for 30 seconds
- Cook quinoa in water: bring to boil, reduce to low, cover and simmer 15 minutes
- Remove from heat, let sit covered 5 minutes, then fluff and cool completely (20 minutes)
- Preheat oven to 180°C (160°C fan) and line baking tray with parchment paper
- Mix eggs, peanut butter, maple syrup, and vanilla until smooth
- Add cooled quinoa, flaxseed, baking powder, and salt, stir until combined
- Fold in chocolate chips or pumpkin seeds
- Scoop 2 tablespoons of dough per cookie onto tray, flatten to 1cm thickness
- Bake 18 to 20 minutes until edges are golden and centres are set
- Cool on tray 5 minutes, then transfer to wire rack to cool completely
- Store in airtight container at room temperature 3 days, fridge 5 days, or freeze 3 months
This recipe is for informational purposes only and is not medical or dietary advice. Please consult a healthcare professional before making any changes to your diet.